QZ qz thoughts
a blog from Eli the Bearded
Tag search results for tech Page 1 of 1

A "Tail" of Two Scanners


Earlier this year, I had a need to scan a stack of documents about an inch thick to share them with a lawyer. I considered busting out my flatbed scanner, an Epson Perfection 4490 which is somewhere around thirteen years old. It was the first scanner I owned which didn't use SCSI. To judge from Amazon, you can still buy them new, but the "high speed USB 2.0" doesn't sound as attractive these days. I selected it for quality reflective (ie typical scanning) and transparency (ie, slides and negatives) work and Linux compatibility.

It still works, but it never was fun to use. It slow to warm up, slow to scan. Every time I use it I seem to need to do the first scan at least twice while I get positioning and cropping right. And closing the lid so often causes a small gust that blows documnents slightly out of position.

So I found a circa $100 scanner, also Epson, a EM-50 "travel" scanner. The Perfection 4490 is about five inches thick and has a a sheet of glass around nine by twelve (for A4 sized scanning) with hefty "bezel" around the glass. I have to clear desk space every time I pull it off the shelf. The EM-50 is about twice the size (and half the weight) of the just the power brick that the 4490 uses. I don't know if it is USB 2 or USB 3, just that I need a converter for my USB-C computer and again Linux compatible.

After scanning my legal documents, which was a breeze and so very much faster than it would have been on the flatbed, I started to look for other things to scan in the EM-50. It's a narrow feed-through design with a stated maximum size of 8.5" x 72", with the target use case there being receipt scanning for expense reports.

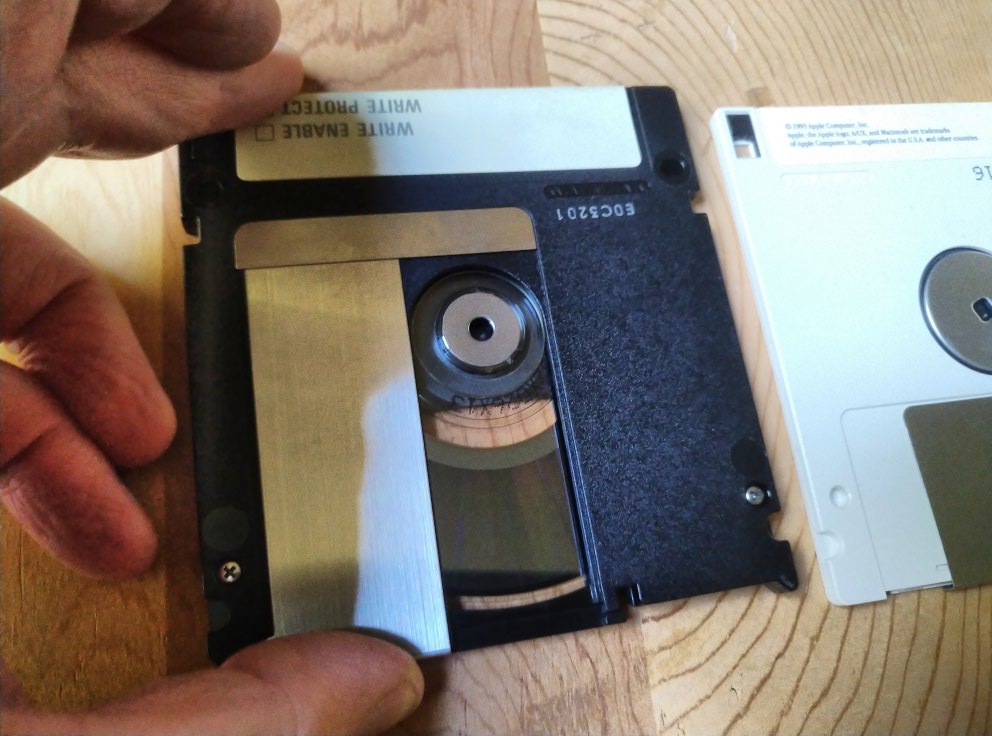
It can also take things that are much thicker than sheets of paper, although still limited to thin. Fun. The apparent use is scanning credit cards, photo IDs, and the like. But I fed a DVD through easily enough. Also a flattened coffee cup sleeve. And a metal ruler.

Flattened coffee cup sleeve with raised hexagon pattern

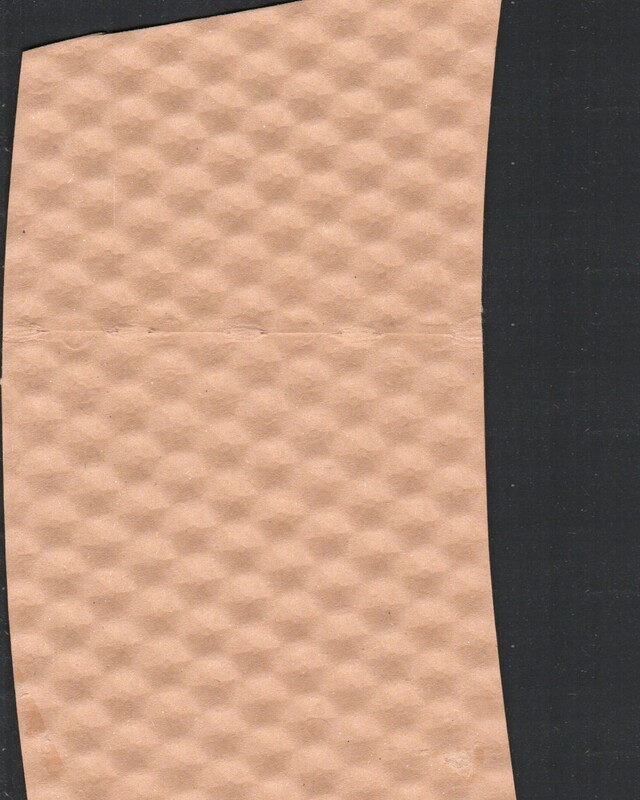
I saved this coffee cup sleeve because it has an interesting texture.

The EM-50 is far from perfect. It has already developed a defect, a line runs down scans about six inches from left. This may well have been related to my feeding "interesting" things through it. The device feels kinda flimsy. It has a roller to feed material through, but only one, and on the far left, so some things twist as they go through resulting in distortion progressively more extreme to the right edge.

But it was inspiring. So I started to think about a newer device for scanning slides and negatives. And then I got "thank you" gift from work and could spend some "money" at a special capitve portal. I looked around and found a Kodak Scanza. $150 at major e-taliers, and $210 at the portal (but not my money, and shipping, taxes, etc included in that price). Seems to be a four year old product.

Epson EM-50 next to Kodak Scanza

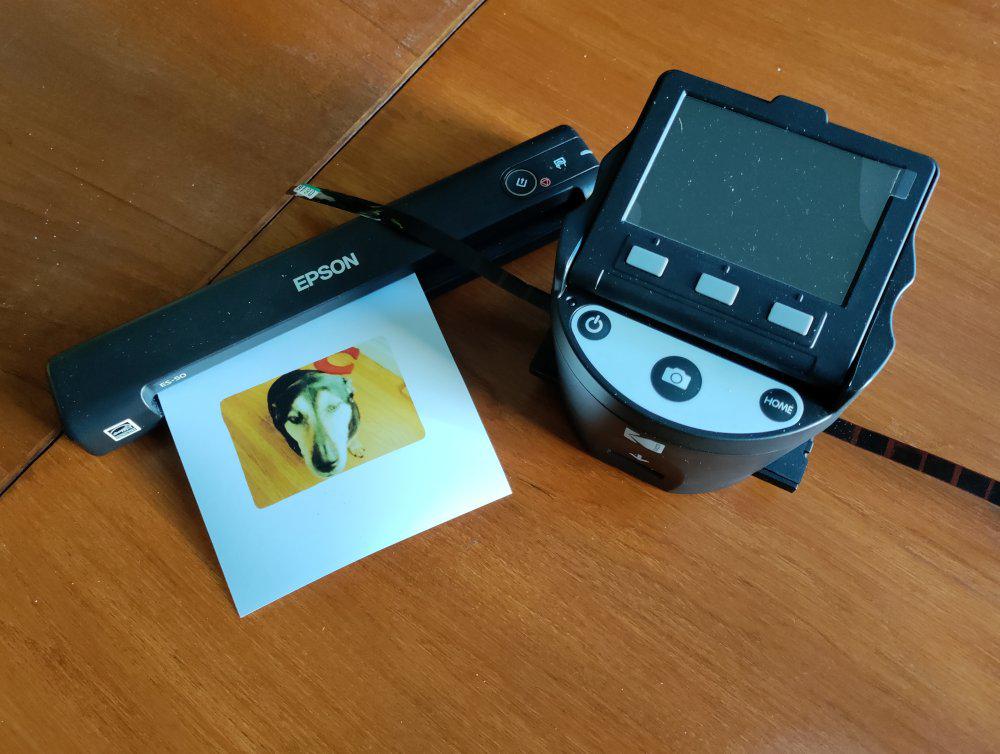
Here's the EM-50 with a dog photo in it next to the Scanza with some Minox negatives.

The Scanza is small, a bit larger than a large coffee mug, and easy to use. That's about all I can say in favor of it. There are few adjustments you can make (and I wanted to adjust brightness). It can only be powered by a USB cord, but doesn't need a computer and came with a janky power adapter. You must provide an SD card to scan to. It doesn't come with even a tiny capacity one (not to mention microSD cards are where it's at these days).

But the biggest sin is the crappy quality of the scan. I expect a "resolution 7200" scan size to give me output that has pretty good fine detail. That's about 280 dots per milimeter, so 8mm x 11mm Minox negatives should be around 2264 x 3113, 7 megapixels.

Scanza scan of my old dog Bo

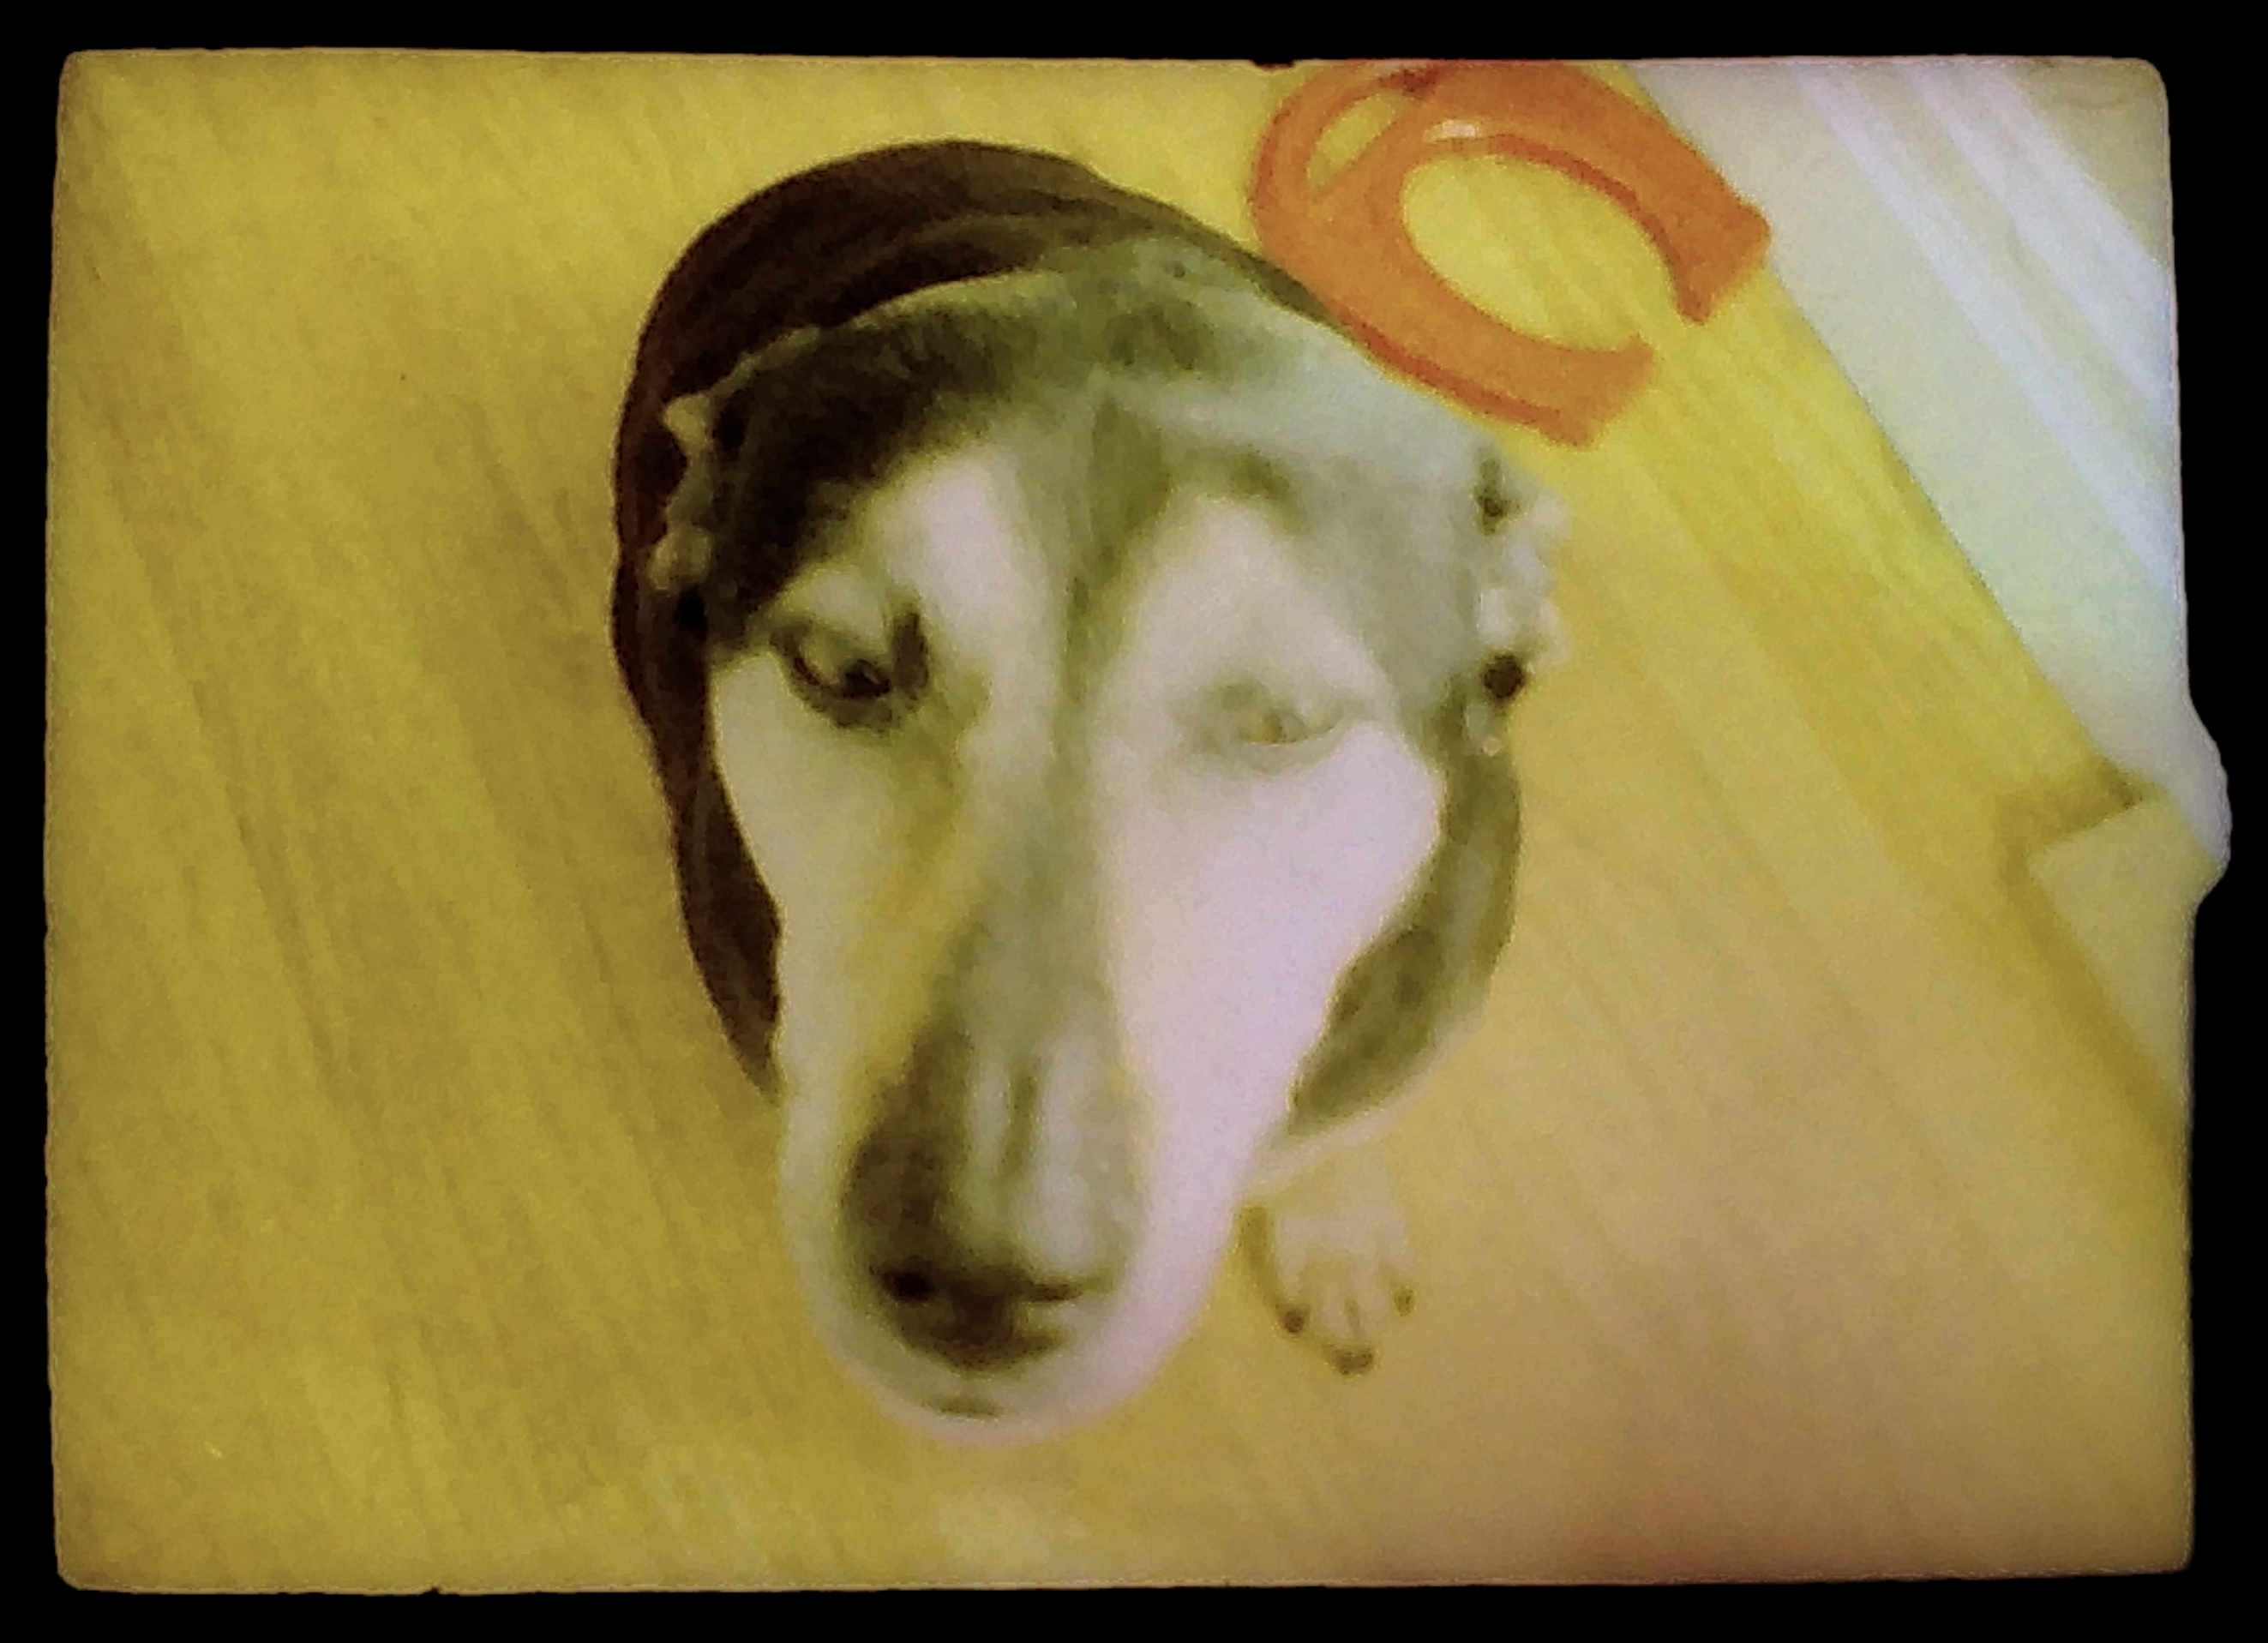
This is a scan of a Minox negative of my dog Bo. The Scanza does not have a Minox setting, I used a 110 setting (13mm x 17mm) and cropped this to 1917 x 2646 (5.1 megapixels). But it looks like a 1 megapixel image that has been upscaled and blurred. There are mottled blotches of color and indistinct edges.

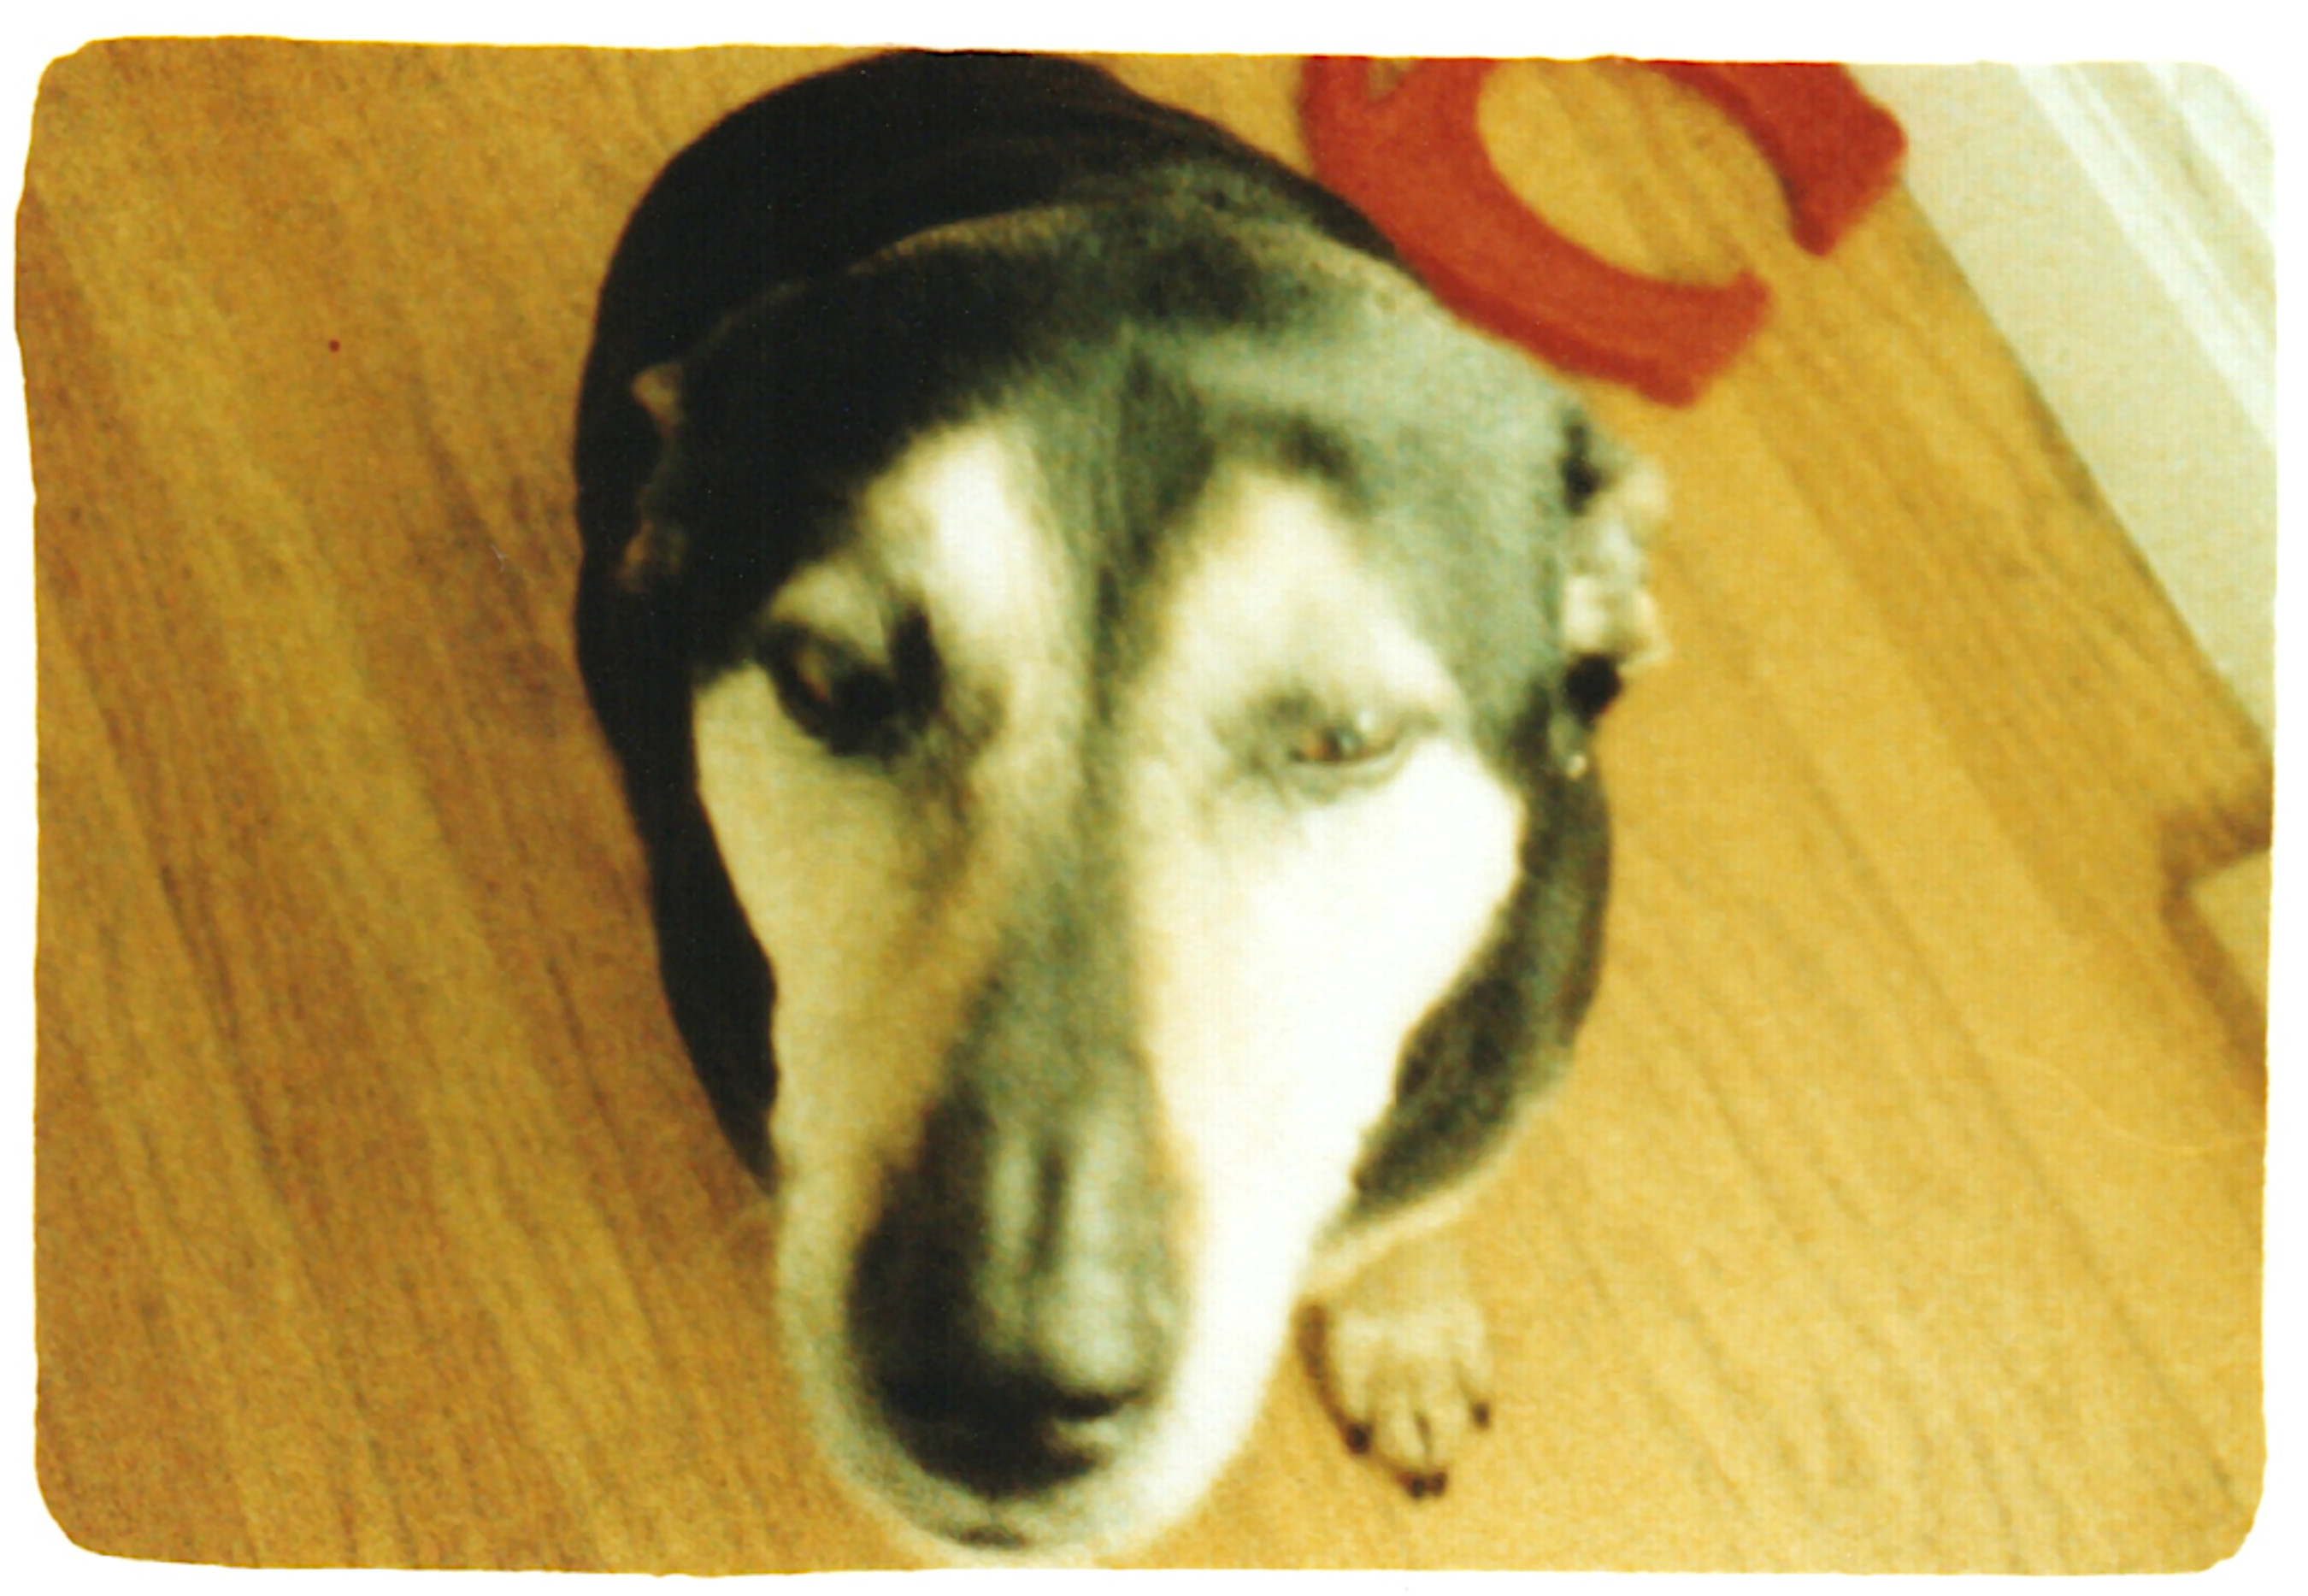
For comparison, here is an Epson EM-50 scan at 600 dpi of a print of the same photo.

EM-50 scan of my old dog Bo

At 600dpi, this is a 2.6 megapixel image (1342 x 1940) but it's much crisper looking. The focus is off, because I'm not great with rangefinders, but you can see the dog has whiskers (at least one of them) and clearly see the wood grain of the floor.

As a matter of fact, I opened the EM-50 scan up in Gimp, downsized it to 1 megapixel, then scaled it back up to 5 megapixels applied a blur and an unsharp mask, and the image still looked better than the Scanza output.

Bo, again, not much worse for wear

This was scaled down to about 1000 pixels wide, then scaled up to 2700 wide. After that I applied a blur and a sharpen.

The Epson EM-50 was more fun than I expected for something so mundane as a scanner. The Scanza was such a disappointment for even a freebie.

Magneto-Optical


In the 1990s, I had an Apple Mac IIci with A/UX. Most of that is a story for another day. All I have left from that system are a few 3.5" (90 mm) floppy disks, a couple of CD-ROM with programs that run on multiple systems (eg, Infocom Games), and my magneto-optical stuff.

I had done my homework researching storage systems for backups. The best sources I had said that Zip drives were "bad", CD-R was "good", and magneto-optical (MO) was "archival". Zips were the cheapest drives of those, and CD-R the most expensive. Media was another matter, I recall CD-R as being cheapest. Media capacity was another thing. My main hard dirve was just 80MB, so a 100MB Zip drive or 128MB MO disk was a huge amount of space, and a CD-R disk was nearly impossible to completely use.

More than two decades on, the longevity advice seems to have been sound. There's a gotcha, however. MO has basically disappeared as a format. Speciallized industrial use apparently exists. Even the audio version, the minidisc, never gained a lot of traction (at least in the US; Japan is another story). CD-R and CD-RW has proved to be a bit fragile, but it is also very widely available, and eventually the media got very cheap, so making multiple copies and duplicating stuff every year is reasonable.

When I was getting rid of my Mac IIci, I kept the MO drive and disks. Then I bought a computer with a SCSI card to be able to read the files. I've still got that computer (although it works poorly), the SCSI card, my MO drive, and all my MO disks. About five years ago I spun up the computer and drive and copied everything to CD-R. About two years ago, I copied those CD-Rs to back-up hard drives. One was bad. I should really spin the whole thing up again and make new copies from the MO disks, but for today, here's some photos.

MO drive, disks, PCI SCSI card

The whole shebang. MO drive, some disks, PCI SCSI card

The 128 megabyte size MO was the smallest version of MO. In the 90mm form, 128 and 230 were available at the time I was buying, and larger capacities in 5.25" (130mm). Eventually disks up to 2 gigabytes were available in 90mm. As an aside, I was quite fond of that Idemitsu logo.

MO disk closeup open

MO disk closeup open. Sector partitions are clearly visible. I used tape to hold it open for this shot, normally it springs shut.

MO end view, next to floppy

The MO disks are about twice as thick as a 3.5" floppy.

disk side by side with floppy front

Same size, and very similar to 3.5" floppy from front

Pencilled in there is a summary of the partition table. This habit of mine made finding the partitions to read the files off from Linux much easier.

disk side by side with floppy back

And from the back; note thought the cover extends over the hub

disk side by side with floppy, MO opened

Back opened to show MO hub

The MO disks are bigger (in thickness), sturdier, and fancier than 3.5" floppies. Since the disks are sectored, the system doesn't need a notch in the hub to align things.

MO drive top with nameplate

MO drive top with nameplate, Epson OMD-5000, December 1992. Pretty sure I got this late 1993 or early 1994.

This was originally in an external enclosure with a 25-pin Mac-style SCSI connector. I pulled the drive out of the enclosure for ease of use post-Mac. The disks get warm during writes, hence concerns about air flow.

MO drive side view

Boring MO drive side view

MO drive side view

MO drive side view with barcode

MO drive front view

MO drive front, same size as a typical 3.5" floppy drive, but sweet 128 megabytes! The sticker on the eject button was optional.

I got, and probably still have, a special eject tool to poke in that hole instead of the standared bent paperclip. I used the tool with other drives, eg, those Macs that used a similar hole to eject CDs. The regular button eject activates an electro-mechanical eject, like on a VCR.

MO drive rear

MO drive rear with power and SCSI connectors plus jumpers. Gotta set that SCSI ID

Relatively sealed MO drive bottom

Drive bottom preserves secrets.

32bit 5v PCI SCSI card, copyright 1999

PCI (32bit 5v) 50-pin SCSI card, copyright 1999. I probably got this in 1999 or 2000.

Other side of PCI SCSI card

SCSI card, rear

The computer I have to use this card doesn't have space inside for the MO, so I used it with the cable coming out the back. I don't keep the card in the computer, because of the cable mess.

Cherry Picking


One thing I have seen time and time again is people using two different branches of code for staging and production and then letting those branches slowly drift further and further apart.

I can fully understand staging should exist for testing stuff before you put it in production, but there should be a steady march of stuff that goes into staging and then maybe a few pieces get backed out, then all of staging syncs to production. Without the regular sync-ups, staging ceases to be an effective place to test things because it's not production + just these small changes but instead it's kinda like production but it has that, this, and some other differences.

But sometimes you have to deal with the hand you're dealt and can't ask for a reshuffle. Which brings us to git cherry-pick.

xkcd 1596

If that doesn't fix it, git.txt contains the phone number of a friend of mine who understands git. Just wait through a few minutes of "It's really pretty simple, just think of branches as..." and eventually you'll learn the commands that will fix everything.

I understand the "graph view" of git quite well. I still find the command line view of git to be a PITA. But it's a truism that people explaining Git get caught up that graph. Here's a page that came up in the first page of search results for git cherry-pick and provides a perfect example.

Once executed our Git history will look like:
    a - b - c - d - f   Master
         \
           e - f - g Feature

Yes, but how do I actually use git cherry-pick?

So with the background that my current most common environment has an "upstream" that represents the real (in-use) repo, a personal fork called "origin" (author dev), and a main (staging) branch of "master" and a production branch of "prod", here's a workable example of using cherry picking.

# If you have the same sort of setup, but haven't yet added prod
# locally, start with:
git checkout --track origin/prod

# Now switch to the prod branch
git checkout prod

# Make this current prod branch match the upstream prod.
# The rebase will discard your local prod history, but presumably
# the upstream prod history is what really matters
git pull --rebase upstream prod

# Now find some commit IDs that are in master but not prod
# and filter those with grep (the grep is optional, but may
# be very helpful). "master" here is a branch you've actually
# commited stuff to, and tested those commits there.
git cherry -v prod master | grep commit-description

# Armed with commits you want to apply, create a branch off
# your current prod to apply those
git branch -c PROD-CHERRYPICK

# Then use "git cherry-pick" to apply the commits to prod.
# If the diffs can be applied cleanly, this will completely
# "commit" the differences. If there are conflicts, you'll
# need to manually edit the files and select which set of
# changes are correct.
git cherry-pick commithash

# Changes applied, you can push that branch of prod to origin
# and make a pull request for origin PROD-CHERRYPICK to
# upstream prod
git push -u origin PROD-CHERRYPICK

Your workflow might not involve branching your origin "prod" for the changes, but it's a little cleaner and allows you to put a meaningful name on the branch. At $WORK, those meaningful names are by convention the Jira ticket names. It's a little awkward because I'll have a branch for PROJECT-NNN, apply that to master, then have to delete that branch and create a new one for my prod changes. The policy exists for the benefit of the computer code tracking my work, though. And poor simple computers are not great at subtly, so that's that.