QZ qz thoughts
a blog from Eli the Bearded
Tag search results for 2020 Page 1 of 19

ASCII art and "ASCII" art


I first had email, and first saw a :-) smiley face in 1990. It was about that time, also, that I was exposed to concrete poetry. Both the smiley and the pictures of words poetry were influential on my mind.

I've had a long lasting love of ASCII art and things near to it since. The first program I saw that could create ASCII art from another image was pbmtoascii from the netpnm package. It worked, but it was kinda disappointing. I had seen, and even made myself, hand drawn ASCII art that was much better than the output of that tool.

$ pnmscale -w 60 < fine.pgm |pgmtopbm |pnminvert |pbmtoascii
 ooo" M o"o" oMMMMMMMMMMMMMMMMMMMMMMMMMMMMMMMMMMMMMMMMMMMo"
M oo"o" M o" MMMMM"MMMMMMMMMMMMMMMMMMMMMMMMMMMMMMMMMMMMMMM "
o"o M "o M "oMMMMM"oM "MoM oMMMMMoo""MMM"ooM"o""" oMMMMMMM "
o" " M o"o"  MMMMMMMoMoMoMMoMMMMMoMMoMMMMoMMMoMMoM"MMMMMMM "
o""oo o o o"o""MMMMMMMMMMMMMMMMMMMMMMMMMMMMMMMMMMMMMMMMMM o"
o"M M M"oM M "o""MMMMMMMMMMMMMMMMMMMMMMMMMMMMMMMMMMMMMM"o"o"
"o"" "" o"" ""o"ooo""""M"M"MMMMMMMMMMMMMMMMMMMMMMM""" o"o"oM
MM"MMMMMoo"M"oo ooo"oooMoMoooooo MMM M"o"oo" ooooo"o"M o ooo
MMMM"MM oM"oM"oMoM""MMMMM"MMM"MM MM MMMMMMMMMooooooooooMMM o
""MMMMM Mo"" "   o"M MoMMMMMMMMo"MM MMMoMMM"MM"MM"MM"MMMo"oM
 MM"MM" o     o MoM"o"M"MMoMMMM MM"MMM"MMoMMMMMMMMMMM"MM"o"M
 MMM o"Mo"Mo"o"M Mo" M""MMMMMoM M"oMMMMM"MMMo"MoMMoMMM"o"M"M
 M"o"o"oM" """" "ooM"oMo"MoMMMM"oMMMMM"MMMMM"o"M"MMM""oMMM"M
o"oM"oMo "M"M"M"Mo"oM"o"ooM""MooMMMoMMMMMoM"oM MMM"o"Mo"o"Mo
M Mo"M" "M"oM oMoo""o"oMM  " "MMMM"MMM"MMM"oMM MM MM"Mo"M"oM
"MoM"   o"M MMM"""MM MM"     "M"MMMMM""""M"M"Mo"oM"M"oMoM"Mo
"Mo"     "oMMM     "oMMo    o MM"""       "M MoM"M"oMMooMM"M
"M    o  M MMM      "oMo "   o"oM     "    MM MM"oMMo"MoMM"M
M        "o"MMo    o M M""" M"Mo     o    M"MoM"oMMoMMMoM"M"
o   "    ""o""Mo"o o"M"oMM"M"oMoo o     o MMMoM MMo"MoMM"M"M
         M"M"oooMo"M M"oM M"oMo"ooo oo"M MMoMM"MMoMM"MoM"MoM
o "  "   M"o"M M M "oo" M"oMo"oMo"oM"o"o"MoM"M"MoMMMMMoM"MoM
M       M"M M"oMoo" M "oo " ""o M oooMM"MMo"MMM"MoMoMM"M"MoM
o Moo"o"M M"o"oM M"o" o   "o"MMM"oMoMoMMMo"MMoMM"o"" """"o""
 "oo" M"o"M M"o"oM Mo"oo oo"o"Mo"MooMMoM"M"MoM"Moo""""" " M
o"Mo "o" M "o"o"o"o"oM M oo"Mo" MM MoMM"M"Mo"M"Mo"MMoMoMMMM
 MM "M M M M M M M"o"o"oM M "oMo"Mo"MoMM"M"oMM"Mo"M"M"MoMMM
"oMo""M "o M M M M M M"o"o"o"oM"Mo"MMo"MM"M"oMMMo""MMM"MoMM
"oM "M M Mo M Mo"oM M M M Mo "Mo"oMMoM"MoMM"M "oo"""o"""o"o"
"o"o"oMo M M M"oM M"o"oM Mo" MM"M"oM"M"Mo" oo"M M""Mo"M"oM M

Eventually I learned there is a higher quality option to the program.

$ pnmscale -w 120 < fine.pgm |pgmtopbm |pnminvert |pbmtoascii -2x4
//,|>|i:(<>/|,HMMMMMMMMMMMMMMMMMMMMMMMMMMMMMMMMMMMMMMMMMM?`S
SSS?!:?</:?? MMMMH##MMMMMMMHMMMMMHMHMMMMMMMMMMMMMMMMMMMMMH`S
??|!|::?://S!MMMMM}{&|'RTk:=MMMMM|?>dMMMk|qHT|9:?/:MMMMMMM S
::\\>\\\:i|>`HMMMM6HHJbM|Md?MMMMHJ6$dMMMkdMRJLHd?P&M]MMMM}i:
SSS>\:\,,:<??:HMMMMMMMMMMMMMMMMMMMMMMMMMMMMMMMMMMMMMMMMMH,\:
SS|$?S4?(L||/S>/*MMMMMMMMMMMMMMMMMMMMMMMMMMMMMMMMMMMMMM",}$\
\\</|+`:?:`^`<??>,??"*##HHHHMMMMMMMMMMMMMMMMMMMMHH*"?:,/($([
RH&HHHH6'<&ST&v:$???$vd&pbqdoooo.MMP$$$?$$??::<v>\\\%%>/.vv,
M9MHH6R|S}&\S1%$?H*/H9H9RM9MH6M&:MM:HHH6H6H6H#\b????vo#H&M!?
<9&6M9M:F1>?^'''.<$[\9R6MHHHDM&}|MH:MRHRM6RMH9R6H6MHH&H9H/?k
|HHHHH/\:.    ./$S1S|JRHMHH6M9M!HM\M&RMHHHH&H6MHHHHHRMH&P|&H
:&M$?\$$$Z$}1?$S$>$?v??#RMMHHMH.H\HRMHH&RM9M9T&RM9M&M&F?/Z&&
:H?&|;4S%\??<^????>$&$S+:#HMHHP|?MH6M9RM96M&P??&6HHM>?d&1&$k
|&iD?D#d:&)&ZZ$\?F1%F$$$$?Z?HModH6MH9MHR6M&R|H/H6M$?S&H$|19|
&:/S&]>-?$S$>???$?<$Z+dM*"`"\?MHHHHHHHHHMH$d9&|9*>&$H&?${&$9
HFS$/-  :$S\MMM*"*Hb`HMT .- -`MM9M9RM**+#bR&$&L\{S6H>b$L$&kR
$Fk? .` :Z|MMR- .  ?|&M: .. -:Md#>*'  . .``H?&d1H&>b&kH+RH$&
DZ' . .  &:MM|.- ` .??Mc: ., $v$/-  `. .. .&9)DH$?HH&1&FkM&&
R  - . . |\?MM\ : -.\<?$PP??{47Z- . - .  .d&1c>$$9HH&1&FkkHZ
: .- -   |S}?*&qv\`,&Z/S$$$Z$k&S:   .   >,H&1&k?6&9H&H&S&$9{
 -. `.`  %&4%F>><1Z/|%$$$?FS$$Z/S\;_\v\&\/RH&H$HH&&DR66&&9S&
:- - . `.9%&4SFS$?!?o:<?$$\%Tk$S1%Z$$>::&6kM&FHH&RH&RH19&$9&
b.- -  /7/Z|$7/$?://?$-\b:?/'!???:?v/&M&&kH\6&HH&19H1&&19&19
//?+>|\$$%}S1?$S|k%|//:   '|?HRMP/FPd9&RH17H&&&FR/+^$???$$?\
:S$|S:%Z>}S$?($??|}Z\\\/,v$>??HT/&ZS&&9&1H?M%HH&|???"":`""?:
!ZF$ /||:S:(|||\\\4|?%|$S;v?&1;:H&>&FDFRH$1}&FkR|&9&H&#9&RM:
i$&||)S/?(|))))))?S??S4|%Z/|Z}&/&7/FRHFDF&k$RH&&|:M&DHHH&RH-
i&$||S}!%&:?SS?((((((((|$$?<:$$FR%FFk&9&S$&H$$R6k|9HFRH9&&M.
|&?||SF>|%Z:$S?SSSS?\\\??\\\`&$$|&&&&ZH&19?&&<???:?+?\<+*++|
|Z$\:S$$ $Z:\(}S4%$?L$$)?Z%||&ZH&&&&Z&&&1^`v>T/Z\\$&)F$$$14|

But that still seemed lack luster to me. About 21 years ago, the date I have in the file is 27 Dec 1999, I wrote my own tool that turns gray scale ("pgm") images instead of bitmap ("pbm") images into ASCII art.

pnmscale -w 60 -h 30 < /tmp/fine.pgm | pgmtoascii
zzxxxzmmzzmzzxOWWWWWWWWWWWWWWWWWWWWWWWWWWWWWWWWWWWWWWWWWWmxz
mmmmmzzzzzzz;WWWWMOOWWWWWWMMWWWWWWWMWWWWWWWWWWWWWWWWWWWWWM,z
mmmmzzzzzzzzxWWWWWYYUmxOYCxXWWWWMXXzUWWWUzUOUXUmYzzWWWWWWM,z
zxzzzzzzzzxz,MWWWWOMOUYMYWUXWWWWOYOUUWWWCUWOUUOUXYUWOWWWWY+z
mmmzx++;++xzmxOWWWWWWWWWWWWWWWWWWWWWWWWWWWWWWWWWWWWWWWWWO+z+
XXXYYYYYYXmmzmxzUWWWWWWWWWWWWWWWWWWWWWWWWWWWWWWWWWWWWWMYzUXm
mmmmmzzzmxmzxzXXmzmXYUCOMMMWWWWWWWWWWWWWWWWWWWWWWOUYXzxmXYYY
OOCCCMMOzmYUYXz+XmmmXmXUUYYYXXXm;WWUYYYYYYYmxmXmzmXXXXmx,xzz
MMMMMMMxYUUUUUUUmOUUOMMMMMMMMMMO+WWxMMMMMMMMMUXXXmmzzXUCOMmm
UCMMMMM+UUYmx;,.,zUYzCMMMMMMMMMUXWMzMMMMMMMMMMMMMMMMMMMMMUmC
+CMMMMUz+,    ,zUUUUmYMMMMMMMMMzCWzOMMMMMMMMMMMMMMMMMMMMUmCC
+OMUmzYUUUYXmXUUUUYmmXXCWMWWWMWxMmOMMMMMMMMMMYOMMMMMMMCmYCCU
+OYUmxUYXmmmmmmmmzXUUUUmzCWWWWUmXMMMMMMMMMMMCmmMMMMMCXXCCCCC
xUmCXCUY+UUUUUUUUUUUUUYYUmUUOWXCMWMMMMMMMMMCmCzOMMUXYCOYXCCY
U+UYUUU;mUUUXXXXXXmYUXCWUx;++UMMWMMMMMMMMMUYCOmCUXUCCCYYUCUC
OCUUX;. +UUXMWWUXYOYzOWX.....;MMMMWMMUUUUCOCUOYxYCOOUYUXUCCC
CUCz... ,UmMWM;....XYUW;.....+MOUUX;......zCXCUUOOUYCCCUCCCC
UU;.... .YzWWU......mXWU,..,,zXXX;  .......CCXOOUYCOCCCCCCCC
U,.....  mXYWW+....,+XmYYXmzYUUU,   ...  .YOOUUUUOOCCOOOCCCU
+......  zUXmUCXx;;zYUUUUUUUUUUU,      .x+OOOOUXOOOOOOOCCCCU
.......  XUUUUXXXXYYYYUUUYUUUUUUYz+;+xmUzUOOOOCOOOOOOOCCCCUC
+.....  ;UUYUUUYYXzmmxmXYYYUUUUUUUUUYXmmUOCOOOOOOOOOOOOCCCCC
U,.... ;YYYXYYYYXmxzXY,Xm+zxzzzmmxmmmUOOOCOUOOOOOOOOOCOOCCCC
xzXzz;XYYYYYYYYYYYYzxz,...,mXMMWUYOUUOOOOOCUCOOOUYXXXXXXYYYY
+XXXm+YYXYXYYYXYYYYYYmz+;xXXXXOUXCUYOOOOCOUOUOOOmXmx+++++xm+
xUUY;XXmzmxmXXXXXXXYYYYXmzzmCUzxCCXCOOOOOUCUCOOOXUMOCUUCOOO+
mUUmxYYzmX+zXXXXXXXXYYYYYYYxYUUYCUYCCCCOCCUUCCOOXXOOMOOOOOO+
mUUzmUUxmYzzXXXXXXXXXXXXXXXX+UUCCYCCCCCCCCUCCOOOUzOOOOOOOOO;
mUUxzUUzzYX+YYXXXXXXmXXXXXXX,CCUXUCCCCCCCCUCUXXXXxXXYYYYYYmm
mUUm+UUY;YU+YYYYYYYYYYYYXXYmxCCCCCCCCUCCCz+xmYYYUUUUUUYYYYYY

Later I did things like convert ASCII art back into images in various ways. asciiversion2color is not a great program (and didn't even work for me today, because pamarith has been is named pnmarith on this system, a hazard of the netpbm tools being old and reaching different places from different paths, but when I did git it working:

$ pnmscale -w 120 fine300.ppm > fine.ppm
$ asciiversion2color fine.ppm textfine.ppm
pnmarith: promoting second file to PPM
HTML version in textfine.ppm.html
$  cjpeg textfine.ppm > textfine.jpg
This is fine, in three color ASCII art

asciiversion2color creates three pbmascii images, one for each RGB channel (in the "ppm" pixmap), converts the ASCII to text-in-image form, then combines the three with a slight offset.

And texttopnm lets you specify an arbitrary tile for each character, as a way of introducing fonts. It has some code for UTF-8 fonts, but I've mostly used it with historic fonts.

$ (echo scale=5; echo 9/14 ) | bc
.64285
$ pnmscale -w 60 fine300.pgm | pnmscale -yscale .64285 > fine60.pgm
$ pgmtoascii fine60.pgm > fine60.txt
$ texttopnm -s .ppm -d font/9x14 fine60.txt 9x14.pgm
$ pnminvert 9x14.pgm |pnmtopng > 9x14.png
This is fine, IBM circa 1981 style

The 9x14 font is the IBM Monochrome Display Adapter hardware font from circa 1981. Quoting Wikipedia:

Each character is rendered in a box of 9×14 pixels, of which 7×11 depicts the character itself and the other pixels provide space between character columns and lines. [...] Each character cell can be set to one of 256 bitmap characters stored in ROM on the card, and this character set cannot be altered from the built-in hardware code page 437. The only way to simulate "graphics" is through ASCII art.

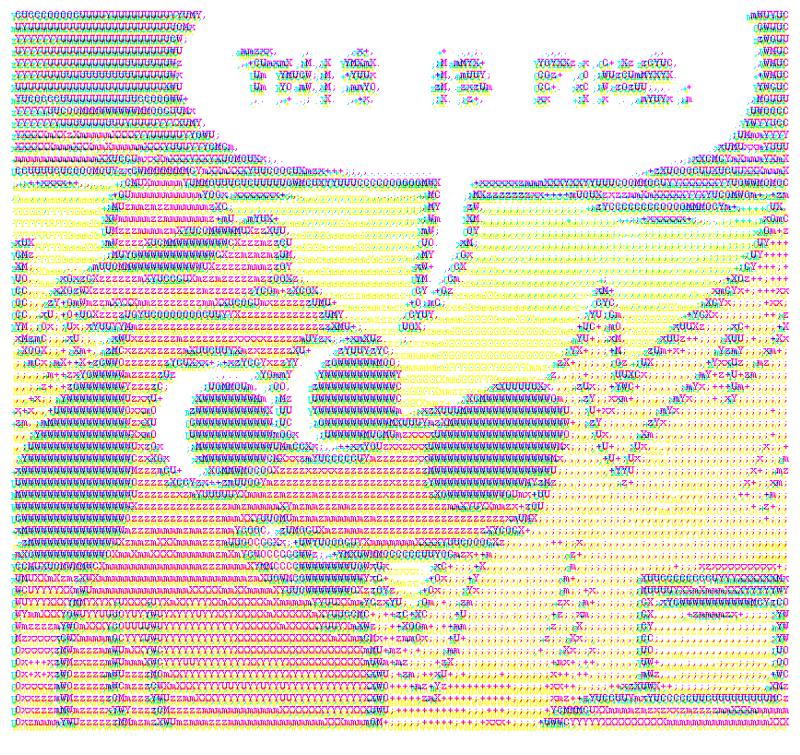
Most recently, I found someone else's code that was created for emulating monochrome bitmap graphics using Braille characters in Unicode in terminal windows. I loved it immediately, and forked it to add a pbmtodots still image converter.

⢅⢌⢔⠔⡔⡪⢊⢆⢣⢒⢕⢱⢑⢡⣾⣿⣿⣿⣿⣿⣿⣿⣿⣿⣿⣿⣿⣿⣿⣿⣿⣿⣿⣿⣿⣿⣿⣿⣿⣿⣿⣿⣿⣿⣿⣿⣿⣿⣿⣿⣿⣿⣿⣿⣿⣿⣿⣆⠑⡪
⠕⡕⢕⠕⡱⡡⡃⡇⢕⠜⡰⡱⢀⣿⣿⣿⣿⡿⠿⠿⣿⣿⣿⣿⣿⣿⢿⢿⣿⣿⣿⣿⣿⢿⣿⢿⣿⣿⣿⣿⣿⣿⣿⣿⣿⣿⣿⣿⣿⣿⣿⣿⣿⣿⣿⣿⣿⣷⠈⡪
⡣⡣⡣⢃⡣⡊⡢⢃⢕⢡⠪⡰⢨⣿⣿⣿⣿⣿⡗⢼⣞⠸⠃⣟⢹⣯⡐⠶⣿⣿⣿⣿⣿⢸⣅⡒⠿⣿⣿⣿⣗⠰⢶⣾⢹⡇⢻⠩⠏⠔⣂⣿⣿⣿⣿⣿⣿⣿ ⡪
⢌⢌⠪⠪⡰⢑⢅⠇⡆⡣⠱⠱ ⣿⣿⣿⣿⣿⣯⣽⣷⣸⣥⣿⢸⣿⣍⣥⣿⣿⣿⣿⣷⣸⣯⣩⣵⣿⣿⣿⣗⣼⣿⣟⣸⣇⣷⣼⣌⡛⣛⣿⣹⣿⣿⣿⣿⡗⠠⡣
⢕⢜⢜⢔⠔⡰⡠⡀⡄⡔⢔⢔⢕⡈⢿⣿⣿⣿⣿⣿⣿⣿⣿⣿⣿⣿⣿⣿⣿⣿⣿⣿⣿⣿⣿⣿⣿⣿⣿⣿⣿⣿⣿⣿⣿⣿⣿⣿⣿⣿⣿⣿⣿⣿⣿⣿⡿⠠⡅⣁
⡪⡪⡪⡎⡏⡮⡺⡱⡝⣜⡜⡔⡅⡣⡢⡉⠿⢿⣿⣿⣿⣿⣿⣿⣿⣿⣿⣿⣿⣿⣿⣿⣿⣿⣿⣿⣿⣿⣿⣿⣿⣿⣿⣿⣿⣿⣿⣿⣿⣿⣿⣿⣿⣿⣿⠛⡰⡽⢜⠔
⠕⠏⠞⠎⠇⠗⠙⣁⣍⡈⠚⠓⠑⠣⡣⣣⣒⢆⢍⣉⠛⠟⠿⠿⢿⢿⢿⢿⣿⣿⣿⣿⣿⣿⣿⣿⣿⣿⣿⣿⣿⣿⣿⣿⣿⣿⣿⣿⡿⡿⠟⠛⢋⢡⢄⠞⠝⡵⣱⢫
⡿⣾⣳⣷⣯⣿⡿⣯⠃⣔⢏⣏⡯⣒⢆⡡⢬⣡⣡⣡⣩⣤⢦⣾⣴⡶⣴⣴⣤⣤⣤⣤⠠⣿⣿⡟⣩⣩⣩⣉⣍⣩⣉⣉⠡⠥⣥⢤⡢⡆⡧⡫⡣⡳⡱⠑⠂⡤⣄⣅
⣿⢿⣽⡷⣿⢾⣟⠇⢼⢕⡯⣪⣺⢕⡯⣲⡩⢷⠟⠞⢿⡾⣿⢷⣯⣿⣻⣾⣻⣯⣿⡽⢐⣿⣿⡂⣽⡿⣽⣯⡿⣯⣿⣻⢿⣶⢦⣥⣡⣉⣌⣨⢤⣤⣴⡿⣽⣻⠇⡙
⡟⢻⣯⣿⣻⣿⣿⡈⢧⡳⡫⠚⠘⠈⢀ ⢀⢴⢝⡵⣊⢽⣟⣿⡷⣿⣻⣯⣿⡾⣷⡏⢸⣿⡿⢐⣿⣟⡿⣾⣟⡿⣾⣻⢿⣽⢿⣽⡿⣯⡿⣯⣟⣿⣯⡿⣯⡟⣨⢷
⡂⣽⡷⣿⣻⣾⠻⡃⡁⡁  ⠐ ⢀⡴⡹⣕⢯⢎⡇⣸⣿⣽⣿⢿⣯⡿⣾⣟⣿⡃⣽⣿⢃⣿⣻⣽⣿⢿⣽⡿⣯⣿⢿⣽⡿⣷⢿⣯⡿⣯⣿⢾⡷⣟⡟⣠⣟⣽
⡐⣽⣿⢏⠴⢡⢺⣪⢗⡽⣱⣣⢖⡞⣕⣏⢯⢎⡗⠝⣠⢕⡙⠷⣿⣟⣿⡿⣿⣽⣿⠠⡿⢃⣾⣿⣽⡷⣿⣻⣷⣿⢿⣽⣿⡋⢿⣻⡿⣯⣿⢿⣽⣻⡻⢃⢼⣺⣺⣺
⠠⡷⡏⣼⢨⡘⢵⢕⣕⢩⢚⠸⠑⠫⢚⢘⣡⢥⢴⢝⡵⣝⢼⢢⡑⢻⣿⣻⣟⣿⡝⡜⢥⣿⡷⣿⣽⢿⣯⡿⣾⣻⡿⣷⢟⢰⡩⣟⣿⢿⣽⣿⠯⢓⡼⣽⢽⣺⡺⣞
⡆⢟⢨⣗⡇⣟⣶⣥⢁⢞⡵⣫⢏⢯⡺⡕⡧⣳⣫⢞⡞⡮⡫⣃⣏⣤⣋⡛⢿⢿⣤⣾⡿⣷⣿⣯⡿⣿⣽⢿⣯⣿⢿⡽⡢⣟⡆⣟⣿⣟⢗⢣⢮⣳⣯⢓⢱⣻⣽⢱
⢷⡈⣼⢪⢗⡵⡛⠂⠸⡕⡯⣺⠹⣘⣨⣌⣍⣌⡚⠵⣫⢚⣼⣿⠟⠉⠈⠉⢂⠻⣿⡾⣿⡿⣾⣻⣿⣯⣿⣻⣿⣽⢛⡴⡯⣗⡇⢽⡞⢥⢾⢽⢽⣺⡪⣎⢮⡗⡧⣟
⢯⣟⢵⣫⡞⠈  ⠩⣫⢮⢣⣾⣿⣿⠛⠛⠛⢿⣦⠑⣽⣿⠇⠂⠈ ⠂ ⠈⣿⢿⣯⣿⣻⡿⣾⠻⠫⠟⠽⢷⣻⣟⠽⡽⣕⠁⣮⢿⢽⢯⠟⣴⢽⢆⢯⡺⣯⢷
⢟⣺⣽⠊ ⢀⠈ ⠈⢮⡃⣿⣿⡿⠁⢀ ⠂ ⠹⣇⢽⣿⡁⠠ ⠂⠈⡀⠨⣿⡻⠿⠝⠟⠁⠠ ⠄ ⢀ ⠱⣳⡏⣽⢵⣫⢷⣻⡛⣥⡯⣗⣿⢵⣫⡯⣗⣟
⡧⣗⠁ ⠄ ⠄ ⠈⠧⡃⣿⣿⣗ ⡀⠠⠈⢀ ⠗⠸⣿⣧⡀⠄⠐⢀⢄⢨⡢⣖⣕⠃  ⠠ ⡀⠐ ⡀ ⡷⡷⡱⣯⢿⡝⣢⣯⡷⡯⣗⣿⢽⣺⢯⢗⣟
⣟  ⠂ ⠂ ⠄ ⢭⢇⡹⣿⣷⣄ ⠠ ⢀⠠⠡⡧⣩⣉⡛⡓⢛⡡⣜⢮⡫⣞   ⠂ ⢀ ⠄  ⡮⣟⣯⣧⠫⡟⢬⣷⣯⢯⡯⣗⣿⢽⣺⣻⢽⡺
⠅ ⠐ ⠁ ⠂  ⢸⢕⣖⢍⠻⠷⡮⡤⠤⠐⣨⣺⢕⢗⣕⢗⡽⣕⢽⡪⡗⣝⡮⡂⠠ ⠠   ⢀⢤⢨⢯⣗⡷⣯⢷⣡⢿⣺⣞⣟⣾⣳⣻⢽⡺⣺⣻⢼
 ⠈ ⡈ ⠐ ⠂ ⢕⢗⡵⡫⣳⢕⡖⣖⢵⢻⢜⢜⢝⢵⢕⢯⢪⣺⡱⣫⢏⡮⣺⢕⡦⣄⢄⢄⣔⢼⣪⠃⣾⢽⣺⣻⡯⣟⣽⣽⣺⢾⣻⡾⣽⣺⡯⡯⣗⡧⣟
⡌ ⠄ ⠈ ⠄ ⠨⣫⢧⢫⡫⣺⢕⢽⢜⡕⢙⢬⣤⡑⠫⠺⡕⣗⢵⡹⣜⢵⢝⡼⣱⡣⡗⡯⡧⠓⡋⡤⣞⣿⢽⣺⣯⢯⣗⣷⢿⡽⣯⢷⣻⣷⢽⣺⡯⣗⣯⢷
⠷⠂ ⠈ ⠂ ⢤⢝⢎⢞⢕⡝⣜⢕⡯⣪⢔⠡⡒⡍⣋⠂⢶⢦⠌⣈⠊⢃⢋⢃⢋⣘⡈⡥⡤⡆⣷⣻⣽⣳⡯⣯⢺⣺⣻⢾⡽⣽⡽⣽⡽⣞⣞⣟⢾⣫⣗⣿⢽
⡒⢬⢺⠴⡤⡂⢕⡧⡫⡮⣣⡳⣹⢜⢵⢕⢧⢫⡣⡆⡡⠣⠂  ⡀⠁⢜⢪⡿⣿⢿⡏⢼⡽⡏⣾⣳⣟⣞⢷⣻⣝⢾⣫⣯⣯⡯⣗⢛⠳⡙⢓⢋⢋⣋⣚⣊⣚⢹
⠐⡵⡱⣹⠜⢐⢇⢏⠞⡎⡞⡜⣎⢞⢕⢕⢏⢎⡞⡵⢕⡕⡦⡡⡠⡠⣪⠏⢦⡙⢿⡏⢼⢽⡺⣱⣽⣺⡷⡯⣟⣾⢣⣟⢞⣾⡺⣯⢇⢢⣍⡈⡉⠉⠉⢈⠁⢉⣨⠐
⠸⣕⢽⡸⢀⢇⢇⡇⠕⡕⡅⢪⢪⢪⢪⢣⢫⢪⡪⡺⡱⣹⢜⢍⣊⢥⢔⠸⡯⣗⢍⠢⡯⣟⢕⣽⣺⣳⢯⣟⡷⣏⣾⡳⢽⣺⣽⢯⡇⢝⣷⡿⡾⡾⣞⣾⡾⣿⢽⡂
⠸⡵⣻⡊⠤⡫⡮⡊⢪⢪⡂⢕⢕⢕⢕⢕⢵⢱⢕⢝⡜⡎⡮⡣⣣⢇⡗⡅⢫⡳⣳⣪⡿⡽⣸⢮⣗⢿⡽⡾⣝⣞⣞⢼⣻⡺⣞⣿⢎⠸⣷⣻⣟⣿⣻⣾⡽⣯⢿⡀
⢸⡽⣺⡂⢹⡹⣪⡃⢹⢜⡆⠜⣜⢜⢜⢕⢕⢕⢕⢇⢇⢏⢎⢞⢜⡜⣜⢕⠨⣞⡕⣟⣞⡣⣟⣽⣺⡯⡯⡯⣗⡯⡮⣟⣼⢯⢷⢯⣗⠸⣻⣞⣷⣻⣞⣷⣻⣯⢿⠠
⠸⣺⢕⡇⠸⣪⢧⡃⠥⣳⢣⠘⡮⡺⣸⢜⢜⢜⢜⢜⢜⢜⢜⡜⡜⡜⡜⣜ ⡷⣝⣎⢖⡽⣕⣗⣷⢽⣫⡯⣗⣯⡫⣞⠷⠛⢋⣋⢬⣈⢙⠚⠞⠳⠝⠞⠗⠯⠓⢸
⡸⣕⢗⢇⠘⡵⡕⣗⠈⡞⣕⡂⢏⢞⢮⢺⡱⡫⣺⢱⡣⣳⢕⢵⢱⢕⢵⡑⢨⣽⢮⢗⣟⡮⣗⣗⣗⢟⡾⣽⢵⠓⠡⠤⡪⡝⡵⡱⣫⢺⡹⡝⣝⢞⡵⡳⡕⣗⢽⢱

It's no longer ASCII art, by a long strech, but it's very clearly identifiable in a modern text window.

Magneto-Optical


In the 1990s, I had an Apple Mac IIci with A/UX. Most of that is a story for another day. All I have left from that system are a few 3.5" (90 mm) floppy disks, a couple of CD-ROM with programs that run on multiple systems (eg, Infocom Games), and my magneto-optical stuff.

I had done my homework researching storage systems for backups. The best sources I had said that Zip drives were "bad", CD-R was "good", and magneto-optical (MO) was "archival". Zips were the cheapest drives of those, and CD-R the most expensive. Media was another matter, I recall CD-R as being cheapest. Media capacity was another thing. My main hard dirve was just 80MB, so a 100MB Zip drive or 128MB MO disk was a huge amount of space, and a CD-R disk was nearly impossible to completely use.

More than two decades on, the longevity advice seems to have been sound. There's a gotcha, however. MO has basically disappeared as a format. Speciallized industrial use apparently exists. Even the audio version, the minidisc, never gained a lot of traction (at least in the US; Japan is another story). CD-R and CD-RW has proved to be a bit fragile, but it is also very widely available, and eventually the media got very cheap, so making multiple copies and duplicating stuff every year is reasonable.

When I was getting rid of my Mac IIci, I kept the MO drive and disks. Then I bought a computer with a SCSI card to be able to read the files. I've still got that computer (although it works poorly), the SCSI card, my MO drive, and all my MO disks. About five years ago I spun up the computer and drive and copied everything to CD-R. About two years ago, I copied those CD-Rs to back-up hard drives. One was bad. I should really spin the whole thing up again and make new copies from the MO disks, but for today, here's some photos.

MO drive, disks, PCI SCSI card

The whole shebang. MO drive, some disks, PCI SCSI card

The 128 megabyte size MO was the smallest version of MO. In the 90mm form, 128 and 230 were available at the time I was buying, and larger capacities in 5.25" (130mm). Eventually disks up to 2 gigabytes were available in 90mm. As an aside, I was quite fond of that Idemitsu logo.

MO disk closeup open

MO disk closeup open. Sector partitions are clearly visible. I used tape to hold it open for this shot, normally it springs shut.

MO end view, next to floppy

The MO disks are about twice as thick as a 3.5" floppy.

disk side by side with floppy front

Same size, and very similar to 3.5" floppy from front

Pencilled in there is a summary of the partition table. This habit of mine made finding the partitions to read the files off from Linux much easier.

disk side by side with floppy back

And from the back; note thought the cover extends over the hub

disk side by side with floppy, MO opened

Back opened to show MO hub

The MO disks are bigger (in thickness), sturdier, and fancier than 3.5" floppies. Since the disks are sectored, the system doesn't need a notch in the hub to align things.

MO drive top with nameplate

MO drive top with nameplate, Epson OMD-5000, December 1992. Pretty sure I got this late 1993 or early 1994.

This was originally in an external enclosure with a 25-pin Mac-style SCSI connector. I pulled the drive out of the enclosure for ease of use post-Mac. The disks get warm during writes, hence concerns about air flow.

MO drive side view

Boring MO drive side view

MO drive side view

MO drive side view with barcode

MO drive front view

MO drive front, same size as a typical 3.5" floppy drive, but sweet 128 megabytes! The sticker on the eject button was optional.

I got, and probably still have, a special eject tool to poke in that hole instead of the standared bent paperclip. I used the tool with other drives, eg, those Macs that used a similar hole to eject CDs. The regular button eject activates an electro-mechanical eject, like on a VCR.

MO drive rear

MO drive rear with power and SCSI connectors plus jumpers. Gotta set that SCSI ID

Relatively sealed MO drive bottom

Drive bottom preserves secrets.

32bit 5v PCI SCSI card, copyright 1999

PCI (32bit 5v) 50-pin SCSI card, copyright 1999. I probably got this in 1999 or 2000.

Other side of PCI SCSI card

SCSI card, rear

The computer I have to use this card doesn't have space inside for the MO, so I used it with the cable coming out the back. I don't keep the card in the computer, because of the cable mess.

udev for the win


So I have an Arduino Uno now and some parts to begin working on my alarm clock project but I'm still new to Arduino and need to get comfortable with programming it. So first thing I do is fire up the standard Arduino GUI programming tool ("IDE" in the argot of those that like such tools).

You need to be added to the "dialout" group...

And I'm ready to Ackchyually it.

Being added to the dialout group is a pretty good fix. But it's not the only way to do that, so "need" is a strong word. The advantage of being in the dialout group is it works pretty generally and without any extra tooling. The disadvantage is group membership is inherited from login, and I don't want to log out and log in again. A logout is as good as a reboot, and usually it is the reboot that forces the logout. These days I try to limit it those to once a month or less, depending on important kernel updates. It's been less than two weeks now, way too soon for that much disruption.

So here follows an alternative route with udev rules.

First I need to identify the device to apply those rules. I'll start with watching what's going on in /var/log/syslog when I plug the device in:

Nov  7 19:49:59 slate-asus kernel: [947954.307562] usb 1-3: new full-speed USB device number 8 using xhci_hcd
Nov  7 19:49:59 slate-asus kernel: [947954.458285] usb 1-3: New USB device found, idVendor=2341, idProduct=0043
Nov  7 19:49:59 slate-asus kernel: [947954.458291] usb 1-3: New USB device strings: Mfr=1, Product=2, SerialNumber=220
Nov  7 19:49:59 slate-asus kernel: [947954.458294] usb 1-3: Manufacturer: Arduino (www.arduino.cc)
Nov  7 19:49:59 slate-asus kernel: [947954.458296] usb 1-3: SerialNumber: 8593731353731234A012
Nov  7 19:49:59 slate-asus mtp-probe: checking bus 1, device 8: "/sys/devices/pci0000:00/0000:00:15.0/usb1/1-3"
Nov  7 19:49:59 slate-asus mtp-probe: bus: 1, device: 8 was not an MTP device
Nov  7 19:49:59 slate-asus kernel: [947954.532024] cdc_acm 1-3:1.0: ttyACM0: USB ACM device

That's all I really need there, but there's other ways to get that information. If you are not used to reading that log, here's the general format of what it is showing:

  • Nov 7 19:49:59 date and time in system default timezone (US Pacific for me).
  • slate-asus computer name. I uniquely name all my computers, and this one doesn't have an obvious model name on it, so color - maker.
  • kernel: / mtp-probe: the name of the component creating the message. Messages from the kernel include the uptime in seconds, eg [947954.532024], which is one week, three days, twenty-three hours, nineteen minutes and a bit over fourteen seconds. Way too soon to reboot.
  • checking bus 1, device 8: "/sys/devices/pci0000:00/0000:00:15.0/usb1/1-3 This message from the media transport protocol probe has one way to identify the device.
  • cdc_acm 1-3:1.0: ttyACM0: USB ACM device This contains the other way. cdc: communications device class; acm: abstract control model. Essentially this is a modem-like serial device on USB (the "universial serial bus"). And modem-like is why the group is dialout.
  • Another way to find the device name is look in the /dev/ directory and find the new file that was created when plugging the device in (here, /dev/ttyACM0) and have the udev system tell us what it is with the udevadm info -a -n /dev/ttyACM0 command (verbose output partially removed):

    # udevadm info -a -n /dev/ttyACM0
    Udevadm info starts with the device specified by the devpath and then
    walks up the chain of parent devices. It prints for every device
    found, all possible attributes in the udev rules key format.
    A rule to match, can be composed by the attributes of the device
    and the attributes from one single parent device.
    
      looking at device '/devices/pci0000:00/0000:00:15.0/usb1/1-3/1-3:1.0/tty/ttyACM0':
        KERNEL=="ttyACM0"
        SUBSYSTEM=="tty"
        DRIVER==""
    
      looking at parent device '/devices/pci0000:00/0000:00:15.0/usb1/1-3/1-3:1.0':
    [...]
      looking at parent device '/devices/pci0000:00/0000:00:15.0/usb1/1-3':
    [...]
      looking at parent device '/devices/pci0000:00/0000:00:15.0/usb1':
    [...]
      looking at parent device '/devices/pci0000:00/0000:00:15.0':
        KERNELS=="0000:00:15.0"
        SUBSYSTEMS=="pci"
        DRIVERS=="xhci_hcd"
        ATTRS{broken_parity_status}=="0"
        ATTRS{class}=="0x0c0330"
        ATTRS{consistent_dma_mask_bits}=="64"
        ATTRS{d3cold_allowed}=="1"
        ATTRS{dbc}=="disabled"
        ATTRS{device}=="0x5aa8"
        ATTRS{dma_mask_bits}=="64"
        ATTRS{driver_override}=="(null)"
        ATTRS{enable}=="1"
        ATTRS{irq}=="123"
        ATTRS{local_cpulist}=="0-1"
        ATTRS{local_cpus}=="3"
        ATTRS{msi_bus}=="1"
        ATTRS{numa_node}=="-1"
        ATTRS{revision}=="0x0b"
        ATTRS{subsystem_device}=="0x201f"
        ATTRS{subsystem_vendor}=="0x1043"
        ATTRS{vendor}=="0x8086"
    
      looking at parent device '/devices/pci0000:00':
    [...]
    

    We'd get the same relevant information from the other identifier using the udevadm info -a /sys/devices/pci0000:00/0000:00:15.0 command. Every single thing in that list of device info can be used as a key for trigging a udev script. The ATTRS{subsystem_device} or ATTRS{subsystem_vendor} is a good choice for being relatively specific to plugging in an Uno and getting a device.

    So now we know what to use as a trigger, let's use that to run a script. In /etc/udev/rules.d/ live *.rules files for what to do for devices. On my system the highest numbered existing rule is 70-snap.snapd.rules, so I'll pick a two digit number higher than that and create my new rules file.

    $ cat /etc/udev/rules.d/80-arduino.rules
    ATTRS{subsystem_device}=="0x201f", ACTION=="add", RUN+="/usr/local/bin/plugin uno"
    $
    

    Each line is a rule. This one says when the subsystem_device attribute is 0x201f and the action happening is an add, then add to the list of things to be run /usr/local/bin/plugin uno. The argument isn't really needed for udev, because there are enough environment variables to use for context, but could be handy for hand running it. I (or you) could match on more than one attribute by just adding them to the list: ATTRS{subsystem_vendor}=="0x1043", ATTRS{subsystem_device}=="0x201f", ...

    With the rule in place, we need to reload the udev configuration in order to have the rule take effect. This is much easier than a reboot.

    # udevadm control --reload
    #
    

    A note on prompts: in my copies of terminal output, a prompt of $ means that it is a command to be run as a regular user, and a prompt of # means it requires superuser privileges. I usually use a superuser shell, but sudo in front of the command is the common way these days.

    Now we have a rule to run something when the device is plugged in, we should figure out what to run. A stub script is very helpful here:

    $ cat /usr/local/bin/plugin
    #!/bin/sh
    
    log=/var/log/plugin-udev.log
    exec >> "$log" 2>&1     # "exec" changes stdout, etc, while running
    
    env
    $
    

    Plug the Uno in, and then look at the plugin-udev.log file.

    $ cat /var/log/plugin-udev.log
    ID_BUS=usb
    DEVNAME=/dev/ttyACM0
    ACTION=add
    ID_VENDOR_FROM_DATABASE=Arduino SA
    ID_PCI_INTERFACE_FROM_DATABASE=XHCI
    ID_SERIAL_SHORT=8593731353731234A012
    ID_USB_DRIVER=cdc_acm
    ID_USB_CLASS_FROM_DATABASE=Communications
    DEVPATH=/devices/pci0000:00/0000:00:15.0/usb1/1-2/1-2.1/1-2.1:1.0/tty/ttyACM0
    ID_MODEL_ENC=0043
    ID_USB_INTERFACES=:020201:0a0000:
    ID_MODEL=0043
    SUBSYSTEM=tty
    ID_MODEL_ID=0043
    MINOR=0
    ID_MODEL_FROM_DATABASE=Uno R3 (CDC ACM)
    ID_PATH=pci-0000:00:15.0-usb-0:2.1:1.0
    ID_MM_CANDIDATE=1
    ID_VENDOR_ENC=Arduino\x20\x28www.arduino.cc\x29
    [...]
    

    There's a lot in there, so I could use ID_MODEL_FROM_DATABASE or ID_MODEL_FROM_DATABASE instead of uno as an argument, but I'm going to stick with that method to flag what to do. But I will have DEVNAME tell me what to act on. Next version of the plugin script:

    #!/bin/sh
    
    what="$1"
    
    # device to try for "uno" if $DEVNAME is not set
    uno_dev=/dev/ttyACM0
    
    log=/var/log/plugin-udev.log 
    if [ ! -w "$log" ] ; then
      echo "$0: Intended to be run as root from udev scripts."
      exit
    fi
    
    exec 3>&1               # create 3 as copy of stdout
    exec >> "$log" 2>&1     # make orig stdout/stderr logfile
    
    now=$(date +%Y/%m/%dT%H:%M:%S)
    
    case "$1" in
      uno) device=${DEVNAME:-$uno_dev} 
           if [ -c "$device" ] ; then
             echo "$now - chowning $device now"
             chown username "$device"
           else
             echo "$now - can't find $device"
           fi
           ;;
      ?*) echo "$now - unrecognized plugin event: $1"
          echo        "unrecognized plugin event: $1" >&3
           ;;
      *)  echo "$now - need a udev event, eg 'uno'"
          echo        "need a udev event, eg 'uno'" >&3
           ;;
    esac

    I juggle stdout/stderr a bit here. First I open file descriptor 3 as a copy of stdout, then I change stdout and stderr to go to the logfile. This means anything normally sent to stdout or stderr will go in the log, and I can capture output and errors there, but because if I want to print to the original stdout (probably a terminal), I need to do it explicitly through file descriptor 3. Any program I run, will use the logfile for output but I can also print to the terminal. I use that for the unexpected usage cases. If someone with privileges runs /usr/local/bin/plugin that gets logged in the logfile and gets a message on the terminal. (Someone without privileges probably gets stopped when I check if the logfile is writable with [ -w "$log" ].)

    So, let's try it out. Plug in the USB cable from the Arduino and:

    $ ls -l /dev/ttyA*     
    crw-rw---- 1 username dialout 166, 0 Nov  8 13:39 /dev/ttyACM0
    $ groups
    username adm cdrom sudo dip plugdev lpadmin sambashare docker rvm
    $ tail -1 /var/log/plugin-udev.log
    2020/11/07T21:51:46 - chowning /dev/ttyACM0 now
    $
    

    Presto, the device "belongs" to me, I can write to it without being in group dialout.

    People often use udev rules for dealing with permissions related to thumbdrives, and there are a bunch of tutorials on doing that sort of thing, but udev is more useful and I wanted to show that.

November Third, Twenty-twenty


Night view of a lit up window with a mannequin

I saw this many times over the past month, mostly at night where it stands out from the brightly lit window.

Day view of same window with a mannequin

During the day it is easier to miss.

Closer view of the window, showing mannequin has VOTE TRUMP sign

The "VOTE TRUMP" sign is not typical of this neighborhood.

Closer still, showing mannequin with VOTE TRUMP sign is the Devil

A mannequin dressed as the devil during the run up to Halloween, well that is typical.

I Voted! sticker and San Francisco ballot voter stubs

When I voted in 2016, there were about 120 votes cast at my local polling place. (San Francisco has a lot of polling locations, so between that and people voting by mail 120 is not a bad turnout.) There were something like three votes for Trump at that location in 2016. Today I was voter #35 there, and I expect the Trump vote will be less this time.