QZ qz thoughts
a blog from Eli the Bearded
Tag search results for undersized Page 1 of 2

Mini Monopoly


Years ago I found some miniaturized games for sale. I don't remember how many were available, but I got Scrabble, Mousetrap, Etch-a-Sketch, and Monopoly. The Scrabble set had a tiny bag for letters, but not a complete set of letters. Mousetrap did have the full rube-goldberg trap, but lacked other pieces. Etch-a-Sketch worked. Monopoly came with a couple of markers (metal, magnetic, to stick to metal board) and dice, but lacked money, property cards, houses and hotels, and the various draw cards. Those small games still appealed to my taste in shrunken versions of things, working or not.

Now I find out there's a new maker of miniaturized games, going by the name "World's Smallest". And they have a Monopoly, too.
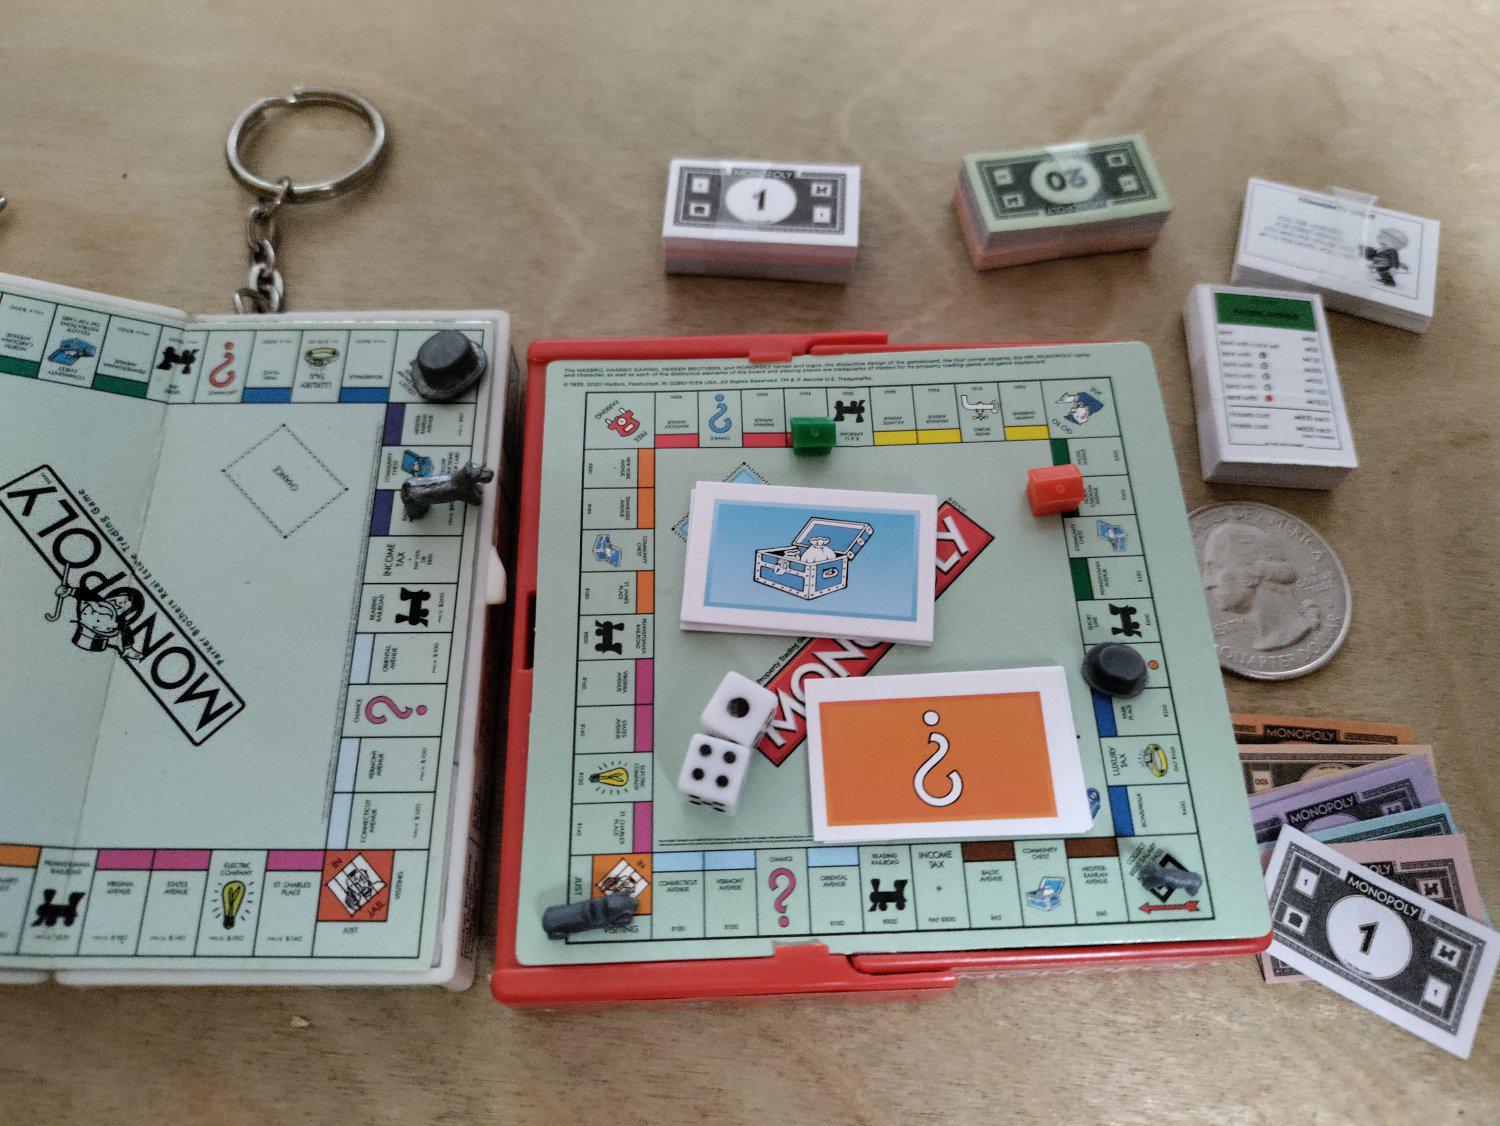
World's Smallest edition on right, older mini version on left

Side-by-side the older gimmick version (dated 1998) and the new World's Smallest (dated 2020) version. The board is about 3" square (around 75mm) on both. The quarter helps provide scale.
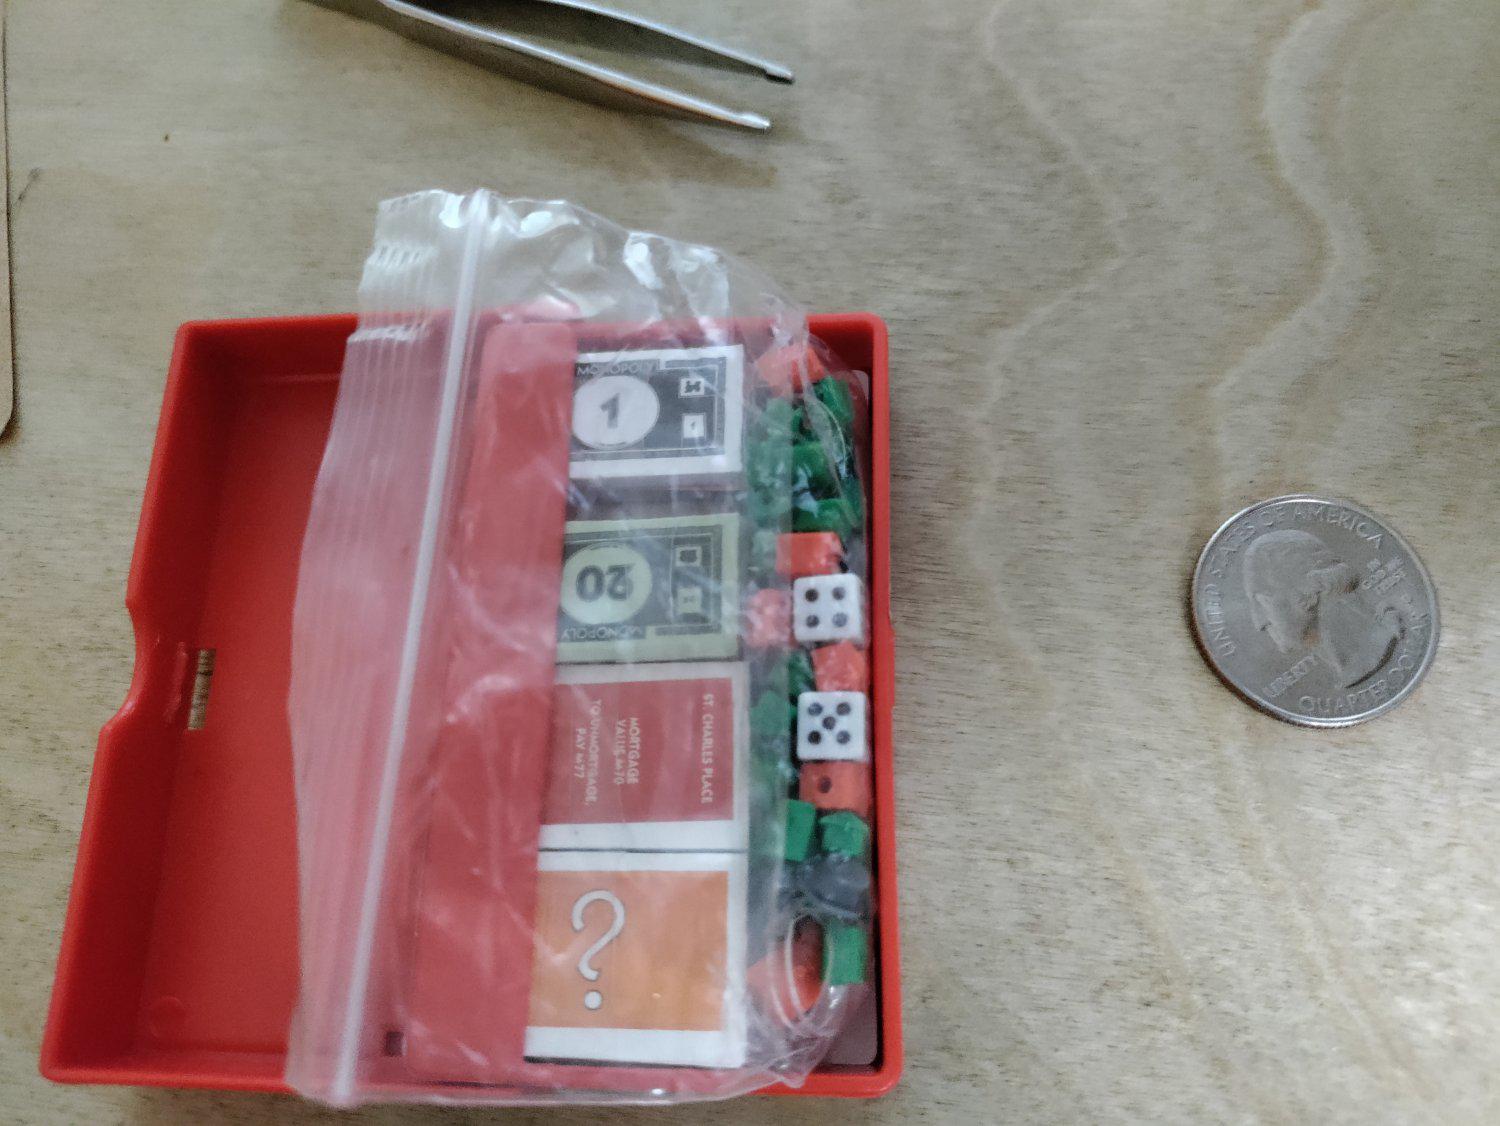
World's Smallest edition packed for storage

All of the game components (including the board) fit inside the 3" × 1.75" × 0.5" case. The older edition had a pull out drawer instead of a folding box. The drawer has much smaller storage capacity.

It's playable in the most technical sense. There are all of the pieces to play the game, but there are many ways this falls short. The houses are not the same scale as the board, so you can't fit two on a property. The Chance and Community Chest cards are also much larger than one would expect given the indicated spots for the draw piles. This board is cardboard, and the markers are plastic: no magnets to hold them down. The money is very hard to manipulate with one's fingers. And many people would want a loupe to be able to read the property cards.

Playable or not, if I saw a smaller edition, I'd still be tempted.

Tiny Media, revisited


A few weeks ago I posted about getting a tiny cassette tape and commented that I needed a microdrive to complete the collection.

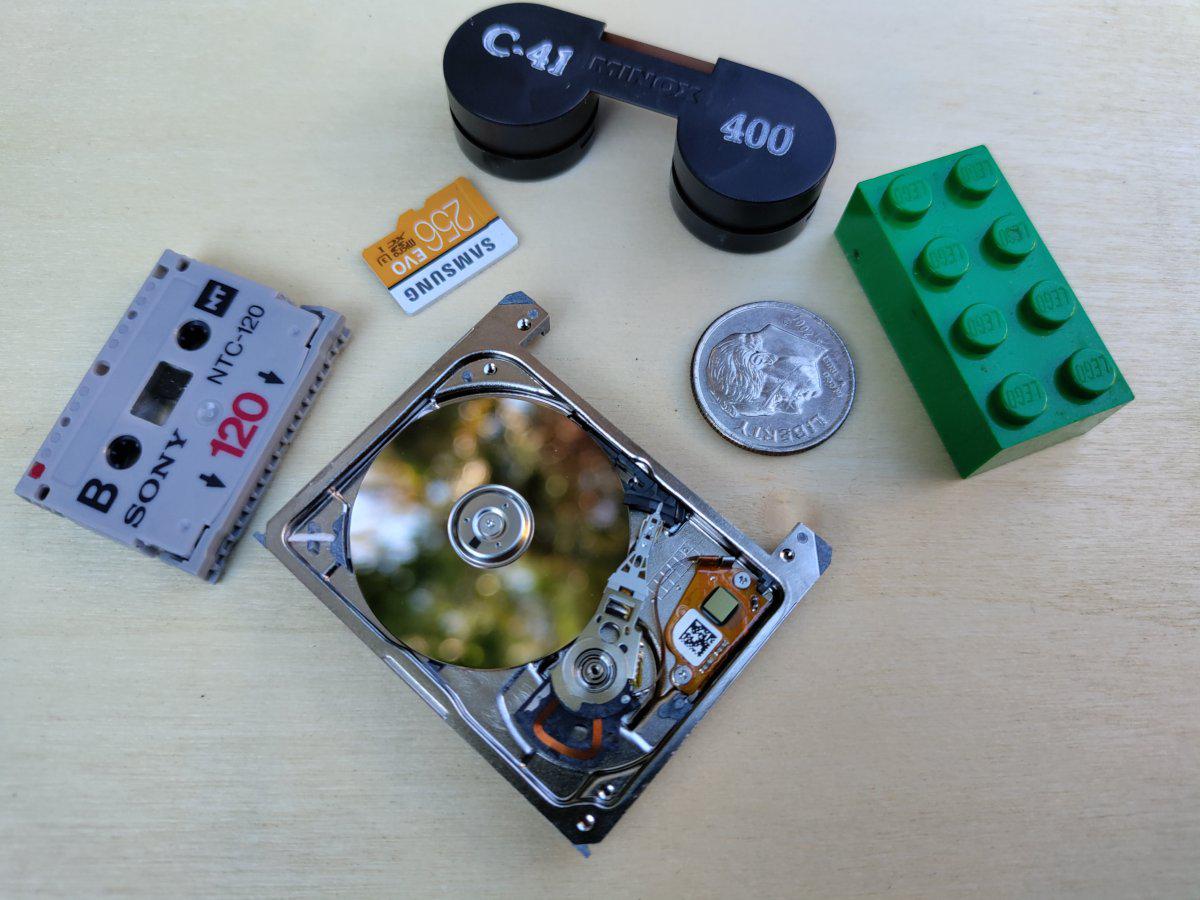
Four pieces of tiny media with a dime and Lego brick for scale

Clockwise from top: a 36 exposure film cartridge for a Minox camera (takes 8 × 11 mm pictures on 9.2mm wide film); a US dime and green a Lego brick of the most generic type (3001, 31.8 × 15.8 × 11.4 mm); a Seagate 4GB microdrive in Compact Flash package (43 × 36 × 5 mm; platter is 26mm Ø); a 120 minute Sony NTC-120 cassette tape (30 × 21.5 × 5 mm; 2.5 mm magnetic tape) and a Samsung micro SD card (15 × mm × 1 mm).

I checked ebay, and microdrives are easy and cheap to find these days, so now I have one. Upon getting I found out I had to buy a new Y000 size tri-lobed screw driver (well, bit for my modular driver) to take it apart. My set of bits, the complete range from Ifixit when I got the set, only went down to Y0. Ifixit now has them. I got a Y00 at the same time to not have a gap.

Somewhere I have a few UMD disks, the DVD-esque media for the Sony Playstation Portable (PSP). At 64mm in diameter, it was smaller than the Minidisk (68mm) format, but it is still much larger than any of these.

Tiny Media


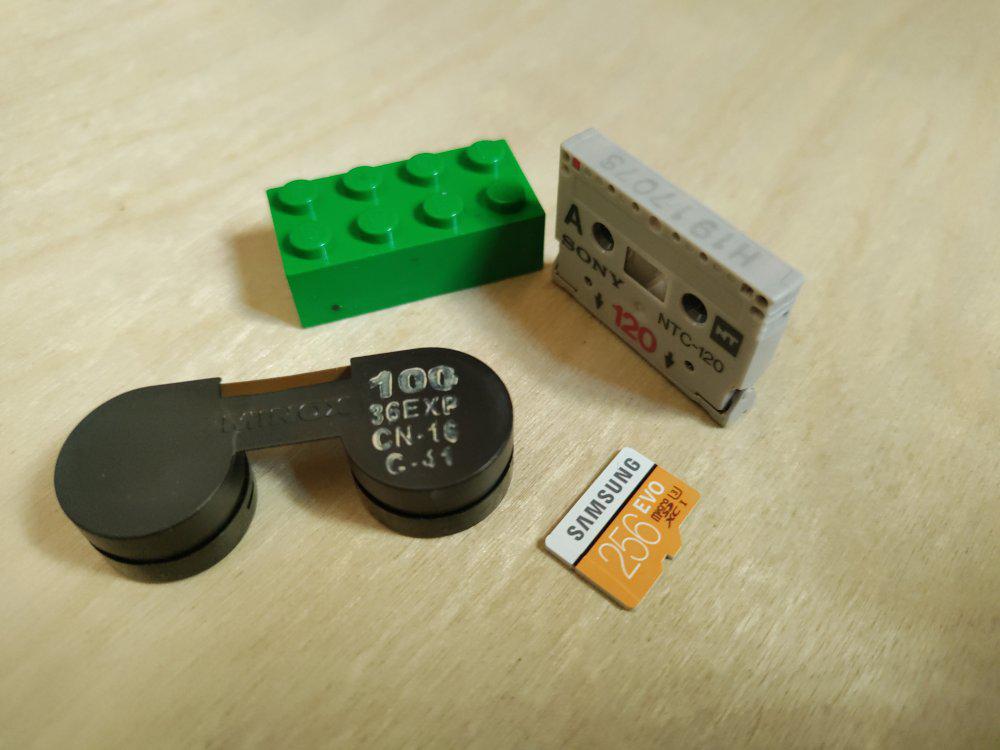
Three pieces of tiny media and a Lego brick for scale

Clockwise: a Lego brick of the most generic size; a 120 minute NTC-120 cassette tape, a micro SD card, and a 36 exposure film cartridge for a Minox camera.

Extremely tiny things amuse me, so when I recently learned about the NT tape format from Sony, I looked on ebay to see if I could find one. About twelve bucks later and I have one. Now I need to get a microdrive to complete the collection.

Update: with microdrive

Micro Press


I saw someone else's teeny press project and was inspired. The design is interesting. Brian Cook's is a simple fold down frame and matching rubber stamps. Pluses: easy to get good registration, simple design and construction. But I can see room for improvement. Minuses: fixed size/shape block, fixed size shape paper, hand-pressed rubber stamps are hard to evenly press.

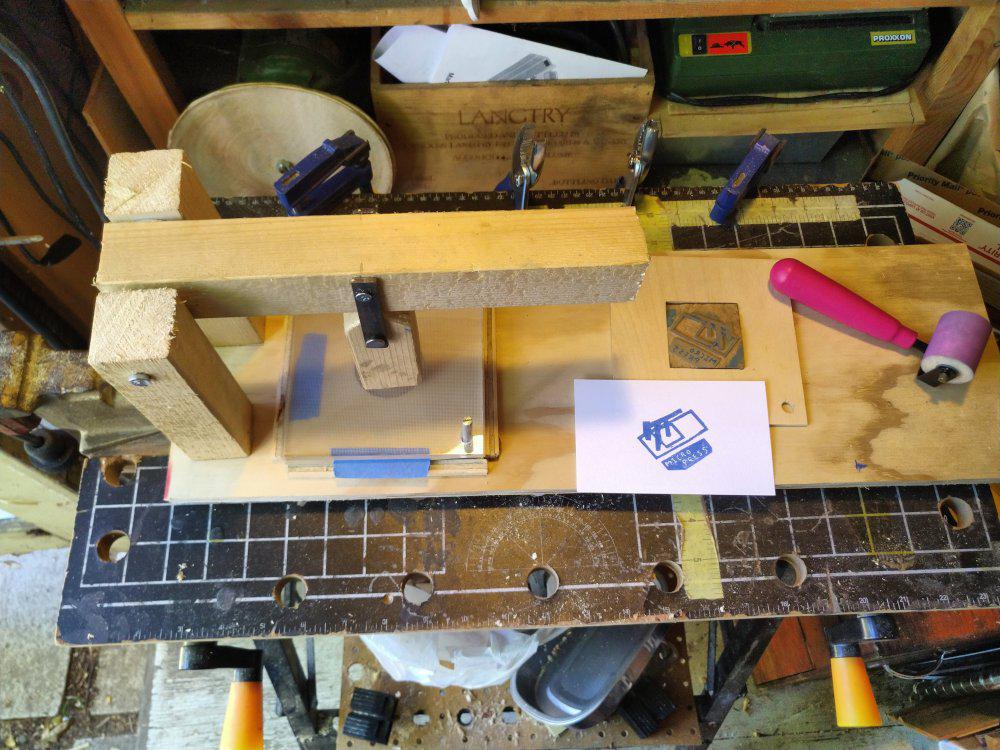
Modeled after a torilla press, I can get a lot of evenly distributed pressure. I made this using only materials I had laying around. There is a scrap of plywood for the base, and smaller scraps to hold the platen. Pine 2x2 for the press part, with 1/4" bolts screwed up from the underside. The main hinge on the lever is a bit of steel rod, the smaller plunger hinge is made from a large nail.

The platen ("flat plate of a printing press that presses the paper against the type") is some thick plastic I cut into 5" squares. The plastic came from an old combination scanner/printer. It seems to be optical polycarbonate with a fine grid printed on it. Very strong, very clear, very hard, very flat. Somewhat tricky to work with. Tools can melt it and then have the molten plastic move to a cooler spot and where the plastic suddenly hardens again. It seized up a drillbit for me, for example.

Very flat and hard makes a great platen.

I have two bolts there for alignment, not support. The stack here is

  1. plywood base
  2. plastic layer (bolts screwed into melted in nuts)
  3. block and frame for holding print block, loose fit over bolts
  4. paper, alignment to be done with masking tape on plastic
  5. second plastic layer, loose fit over bolts

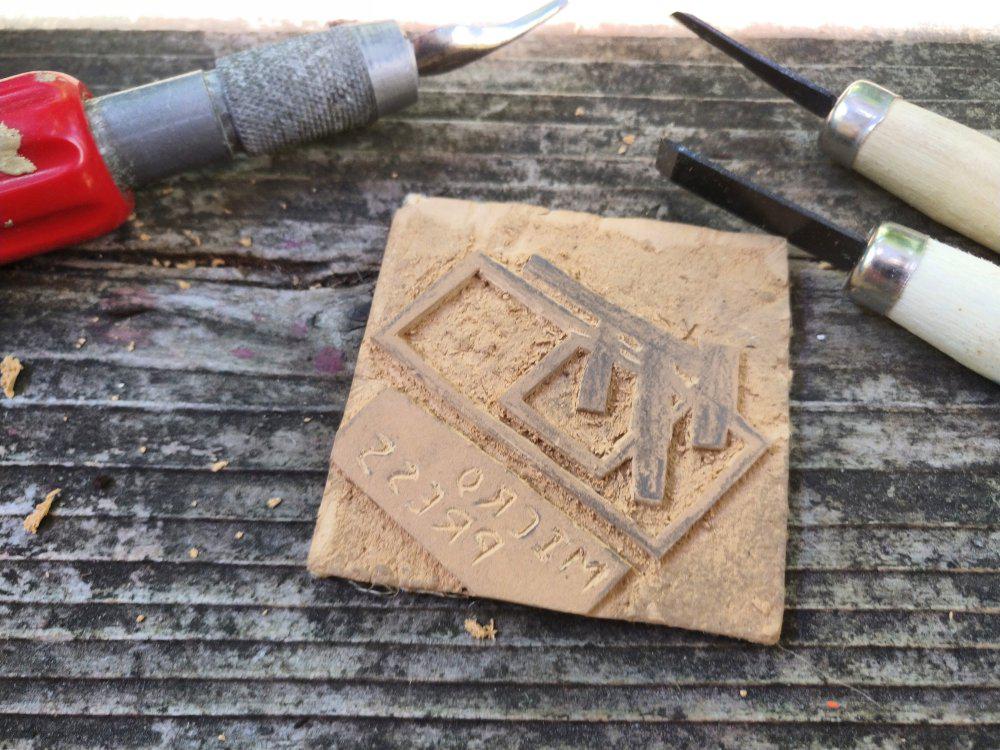
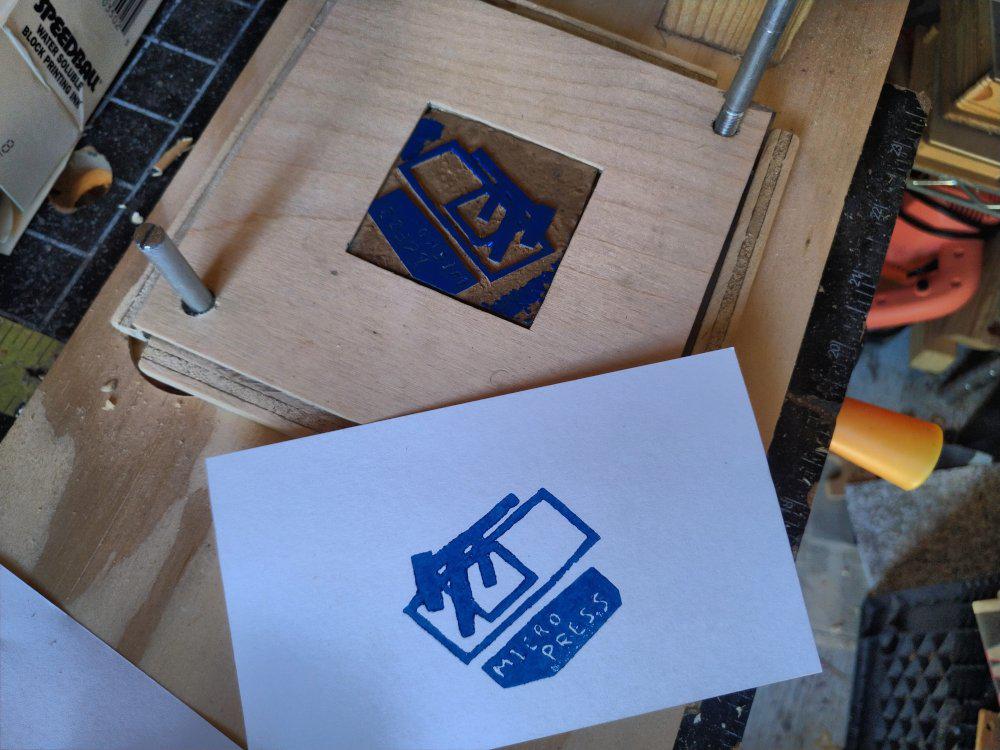
I have a lot of small chisels for lino work. None are great, but I'm not a great artist either. I decided on a simple rendition of the press itself for the first print (above). There's something satisfying in linoleum carving I find. Like Brian Cook's press, this is a two inch square. Unlike his, my press can accomodate other (small) sizes and shapes.

Pretty successful. The letters didn't come out as clearly as I'd like. My smallest chisels don't seem sharp or fine enough to do lines that small.

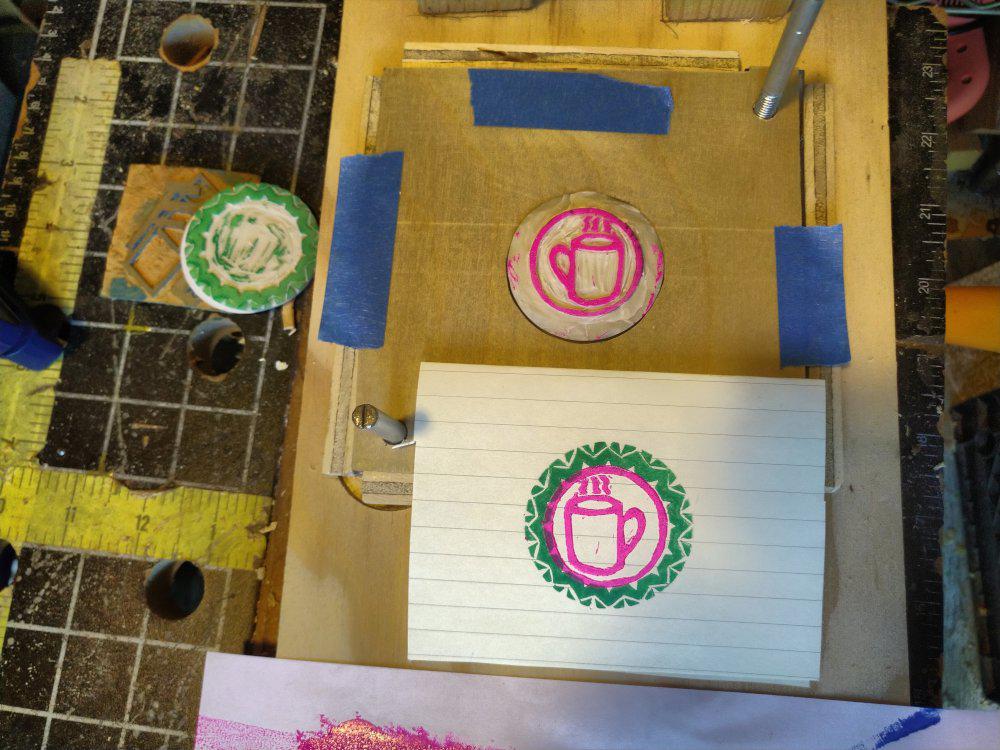
Here's an example of moving away from the two inch square, here with 45mm circular blocks.

I have two multipacks of these plastic linoleum substitute printing discs, purchased on a whim some years ago. The idea behind them is to make stamps with a special handle. I don't have the handle. These are not satisfying to carve. The print surface is smooth and firm, then it gets softer in the middle, with a rough backside coated with adhesive. The material is harder to cut than real lino. The adhesive to attach (it to the handle) is strong enough to be annoying but not strong enough to be effective.

I carved a border first (the green) then a second disc with an image. I didn't print the border onto the second, but did attempt to measure how much space I needed. It seems like I should use a more accurate system.

Overall, I'd say the press is pretty effective, and meets the goals I had in mind when I started. After using it I find that it is very easy to get a nice even pressing of the block into the paper, paper alignment (registration) works pretty well, and making new frames is pretty easy. It does have the drawback that it's somewhat slow and cumbersome to ink-up and swap paper. I hadn't given that enough thought during the design. Still, it works and cost me nothing.